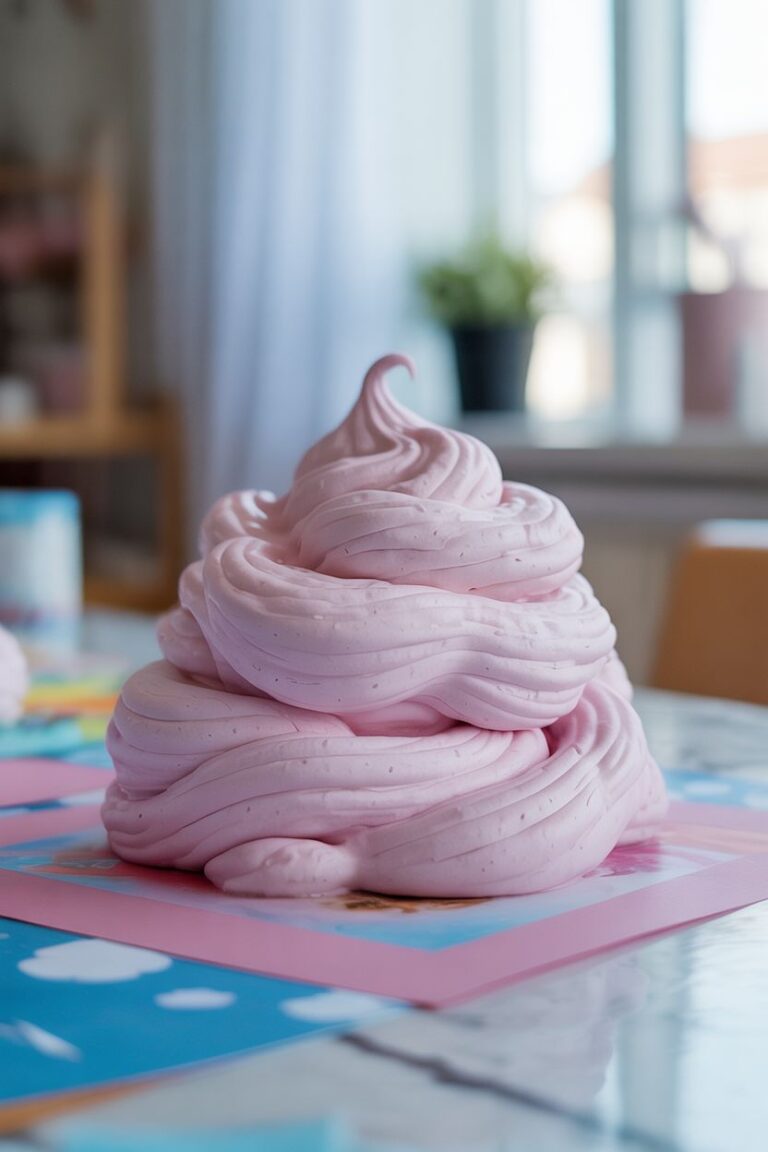
Slime has become a beloved craft and sensory activity for kids and adults alike. But what if you don’t have glue on hand? No problem! This easy recipe shows you how to make the most satisfying, stretchy slime without using any glue at all. Get ready to dive into a world of squishy, oozy fun!
Whether you’re looking to entertain the little ones or simply want to indulge your own inner child, this glue-free slime recipe is a game-changer. With just a few simple ingredients and a bit of elbow grease, you’ll be on your way to creating the most mesmerizing, moldable slime that will keep you entertained for hours. Let’s get started on this ultimate slime-making adventure!
🧴 What Makes This Recipe So Incredibly Good ?
What sets this glue-free slime recipe apart is its unparalleled texture and versatility. Instead of relying on traditional glue, we use a special combination of ingredients to achieve the perfect slime consistency – one that’s endlessly stretchy, gooey, and satisfying to play with. The result is a sensory experience that will captivate both kids and adults, allowing you to get lost in the mesmerizing tactile sensation of the slime.
But it’s not just the texture that makes this recipe a standout. The fact that it’s completely glue-free means you can whip up a batch without worrying about harsh chemicals or sticky messes. Plus, the customization options are endless – you can mix in your favorite colors, scents, and even glitter to create a truly personalized slime experience. Get ready to unleash your creativity and have a blast in the process!
🧪 Method 1: Dish Soap and Cornstarch Slime
🎨 Ingredients
• 4 tablespoons cornstarch
• Food coloring (optional)
🎨 Instructions
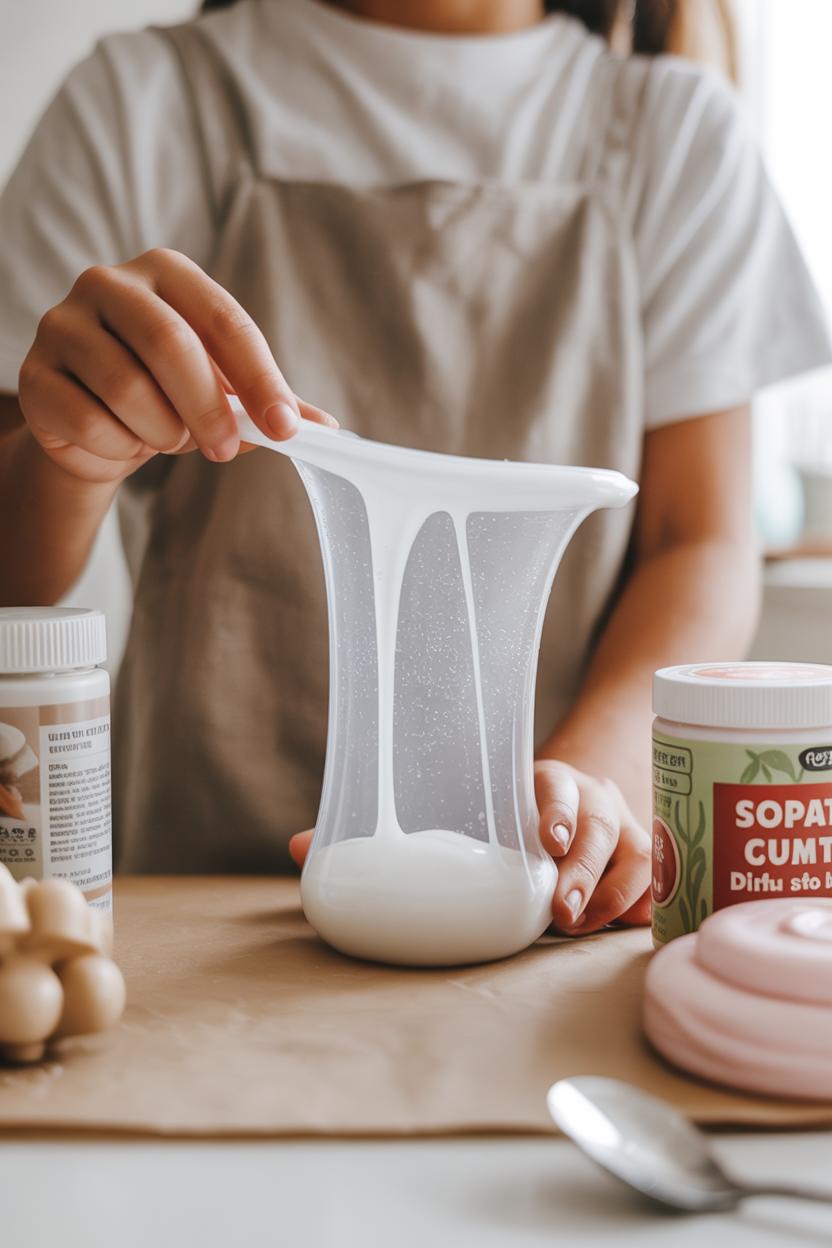
- Pour the dish soap into a mixing bowl. If you want colored slime, add a few drops of food coloring now and stir.
- Add cornstarch one tablespoon at a time, stirring after each addition. The mixture will start out watery but will thicken as you add more cornstarch.
- Keep mixing until it forms a dough-like consistency.
- If it’s too sticky, add more cornstarch. If it’s too dry, add a tiny bit more dish soap.
- Knead with your hands for 2-3 minutes until smooth and stretchy. This slime is slightly sticky but very moldable and fun to play with.
🧴 Method 2: Shampoo and Salt Slime
Ingredients:
- 1/2 cup thick shampoo (gel-based works best)
- 1 tablespoon salt
- Optional: food coloring
Instructions:
Pour shampoo into a bowl. Add food coloring if desired and mix well. Sprinkle in the salt and stir vigorously for about 3 minutes. The salt helps thicken the shampoo. Place the bowl in the freezer for 15-20 minutes. The cold temperature helps the slime set. Remove from freezer and let sit at room temperature for 2 minutes. Knead with your hands until it becomes stretchy and slime-like. This slime is glossy and smooth with a unique texture that’s different from traditional slime.
💧 Method 3: Conditioner and Cornstarch Slime
Ingredients:
- 2 tablespoons hair conditioner
- 1 cup cornstarch
- Food coloring (optional)
Instructions:
Add conditioner to a large bowl. Mix in food coloring if using. Pour in cornstarch gradually, stirring as you go. The mixture will look crumbly at first—this is normal. Keep mixing with a spoon until you can’t stir anymore. Use your hands to knead everything together, squeezing and folding until it forms smooth slime. If too sticky, add more cornstarch one tablespoon at a time. If too stiff, add small amounts of conditioner. This creates a soft, playdough-like slime that smells wonderful and stretches nicely.
🍰 Method 4: Edible Pudding Slime
Ingredients:
- 1 cup instant pudding mix (any flavor)
- 1/2 cup cornstarch
- Water as needed
Instructions:
Empty pudding mix into a bowl. Add cornstarch and mix the dry ingredients together. Slowly add water, one tablespoon at a time, stirring constantly. You want a thick, slime-like consistency—not too runny. Keep adding water until you reach the perfect texture. Knead with your hands for a minute or two. This slime is completely edible and tastes delicious. Chocolate pudding makes brown slime while vanilla creates a white or beige color. Kids love this version because they can safely taste it while playing.
🧼 Method 5: Soap and Toothpaste Slime
Ingredients:
- 2 tablespoons thick gel toothpaste
- 1 tablespoon dish soap
- 1 teaspoon sugar
Instructions:
Squeeze toothpaste into a small bowl. Add dish soap and mix thoroughly. Sprinkle in sugar and stir well for 2-3 minutes. The sugar helps thicken the mixture. Place in freezer for 30 minutes to set. Remove and knead gently. This creates a small batch of smooth, minty-scented slime. It won’t be super stretchy but has a unique bouncy texture that’s fun to poke and squish.
🎥 Video Tutorial
Watch this helpful video demonstration showing multiple no-glue slime recipes in action:
The video shows step-by-step instructions for various no-glue slime methods and helps you see what consistency to aim for with each recipe. Visual learners will find it especially helpful to watch the mixing techniques and final textures.
🎨 Tips for Perfect No-Glue Slime
Use thick, gel-based products for best results. Watery shampoos or thin dish soaps won’t create the right texture. Knead thoroughly most no-glue slimes need 3-5 minutes of hand mixing to reach the perfect consistency. Don’t expect the same texture as glue-based slime. These versions are often slightly stickier or more playdough-like, but that’s what makes them unique.
Store your no-glue slime in airtight containers or ziplock bags. Most recipes last 3-5 days before drying out. If slime becomes too stiff, add a few drops of water and knead. If too sticky, dust with cornstarch. Experiment with different brands some dish soaps and shampoos work better than others depending on their thickness and ingredients.
💡 Troubleshooting Common Problems
- Slime too sticky: Add more cornstarch or powder ingredient, one tablespoon at a time, kneading between additions.
- Slime too stiff: Add tiny amounts of liquid ingredient (soap, conditioner, or water), mixing well after each addition.
- Slime won’t come together: Make sure you’re using thick, gel-based products. Watery ingredients don’t work well. Also try freezing methods, which help set certain slime types.
- Slime fell apart: This usually means too much dry ingredient. Start over with better proportions.
⏱️ Time Overview
- Prep Time: 5-10 minutes per recipe
- Setting Time: 15-30 minutes (for freezer methods)
- Total Time: 20-40 minutes depending on method
❓ FAQs
Can I use regular white glue instead of clear glue?
While it is possible to use regular white glue in this recipe, the results may not be as satisfactory. Clear glue or contact lens solution provides a more transparent and vibrant slime. White glue can result in a more opaque and sometimes thicker texture.
What if my slime is too sticky or too dry?
If your slime is too sticky, add a small amount of extra liquid starch or detergent and knead it in until the consistency improves. If it’s too dry and crumbly, add a few drops of the glue or contact lens solution and continue kneading until it becomes smooth and pliable.
Can I make this slime without a microwave?
Absolutely! This recipe does not require any heating or microwaving. Simply combine the ingredients in a bowl and knead the slime by hand until it reaches the desired texture.
How long does homemade slime last?
Properly stored, your homemade slime can last for up to 1 week in the refrigerator. For longer-term storage, you can freeze the slime for up to 3 months. Just be sure to thaw it at room temperature before using it again.
Can I add food coloring or other mix-ins?
Yes! This slime recipe is highly customizable. Feel free to mix in a few drops of food coloring, glitter, sequins, or other small trinkets to create your own unique slime creations.
🍿 Your Next Delicious Step
Now that you have the ultimate guide for making slime without glue, it’s time to let your creativity shine! Gather your supplies, whip up a batch of this mesmerizing slime, and get ready to dive into a world of endless sensory exploration. Whether you’re making it for yourself or sharing the experience with loved ones, this glue-free slime is sure to bring endless hours of joy and wonder.
So, what are you waiting for? Let’s get sliming!