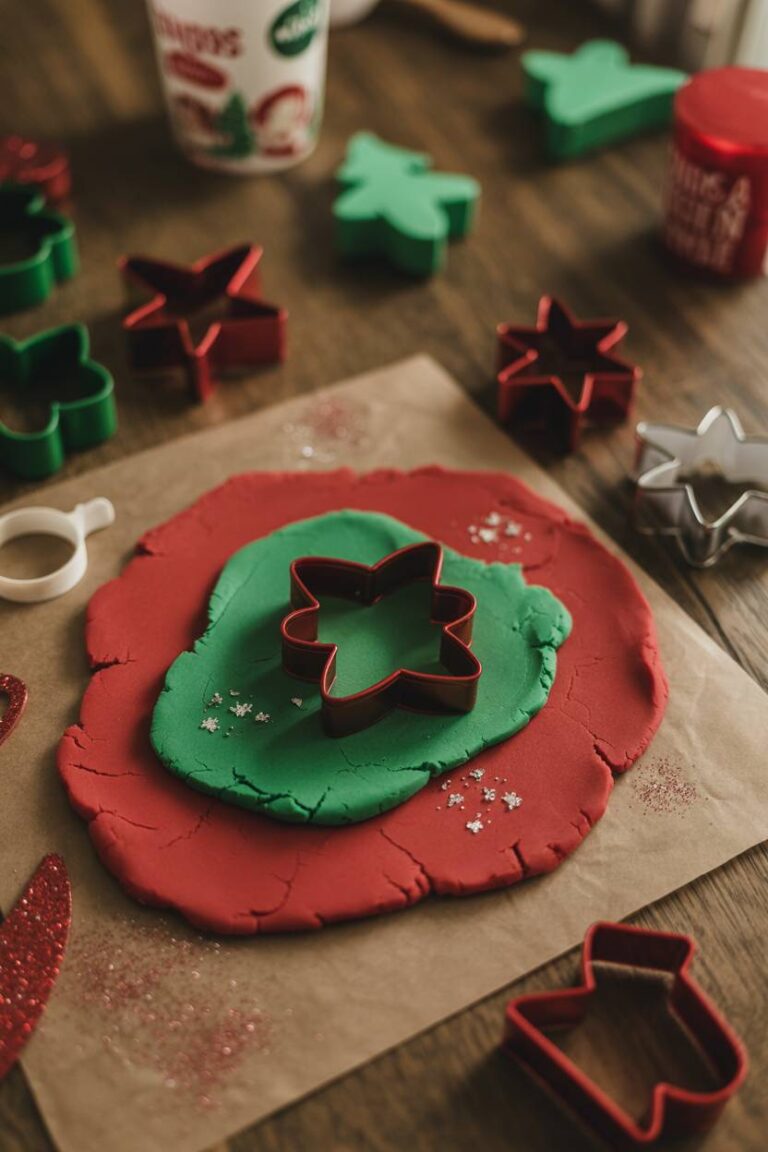
Explore 10 easy and fun air clay ideas for kids! From miniature donuts to dinosaur fossils, these no-bake crafting recipes are perfect for creative play.
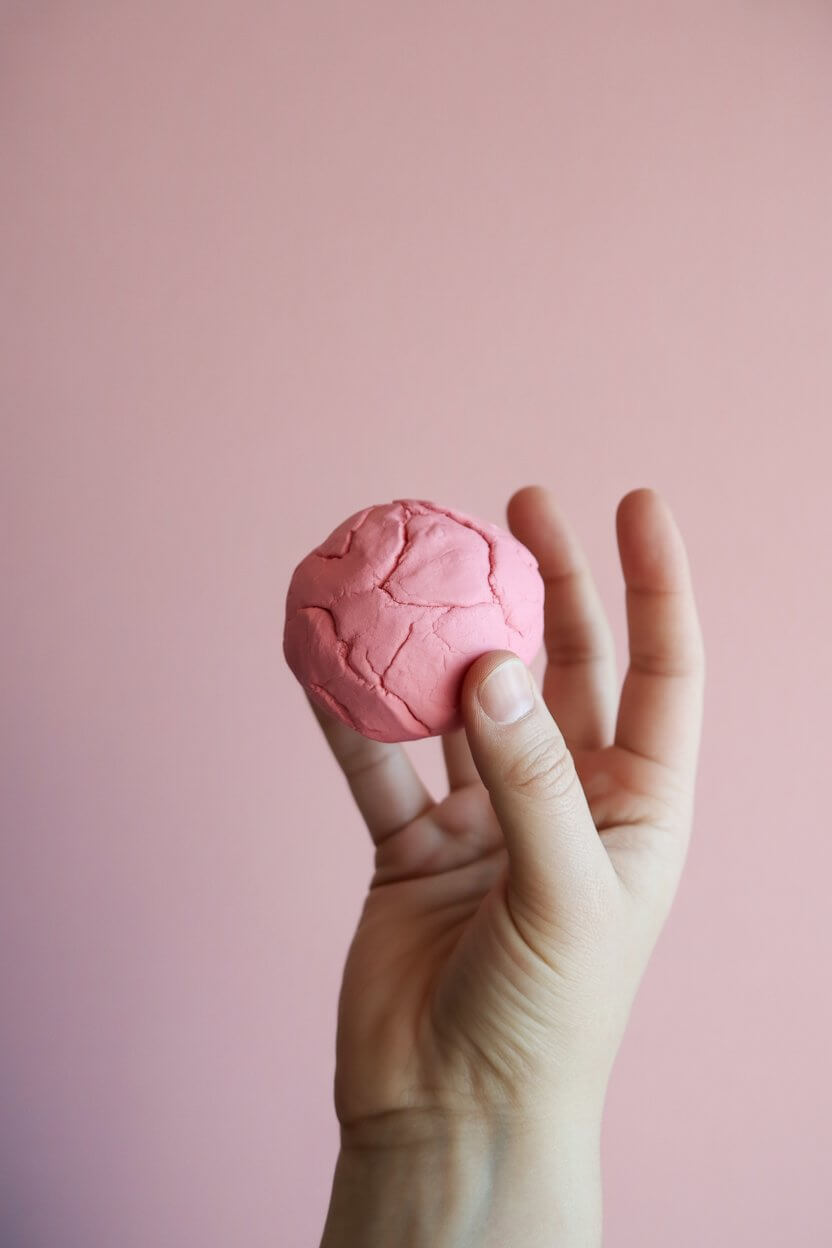
Welcome to the ultimate creative kitchen, where the dough doesn’t rise in the oven, but dries in the air! As a culinary journalist, I usually explore flavors and textures, but today we are swapping flour for air-dry clay to cook up some imagination. Air clay is the perfect medium for young creators; it offers the tactile satisfaction of bread dough without the need for a kiln or complex baking schedules. It is pliable, forgiving, and serves as an excellent vehicle for developing fine motor skills and artistic expression.
Whether you are looking for a rainy day activity or a handmade gift project, this menu of air clay ideas for kids ranges from beginner appetizers (simple pinch pots) to main courses of structural engineering (coiled pots).
Prepare your workspace like a chef prepares a station clean surfaces, tools at the ready, and a dash of creativity.
Let’s dig in and start sculpting these zero-calorie masterpieces!
Creativity #10: Miniature Donut Magnets
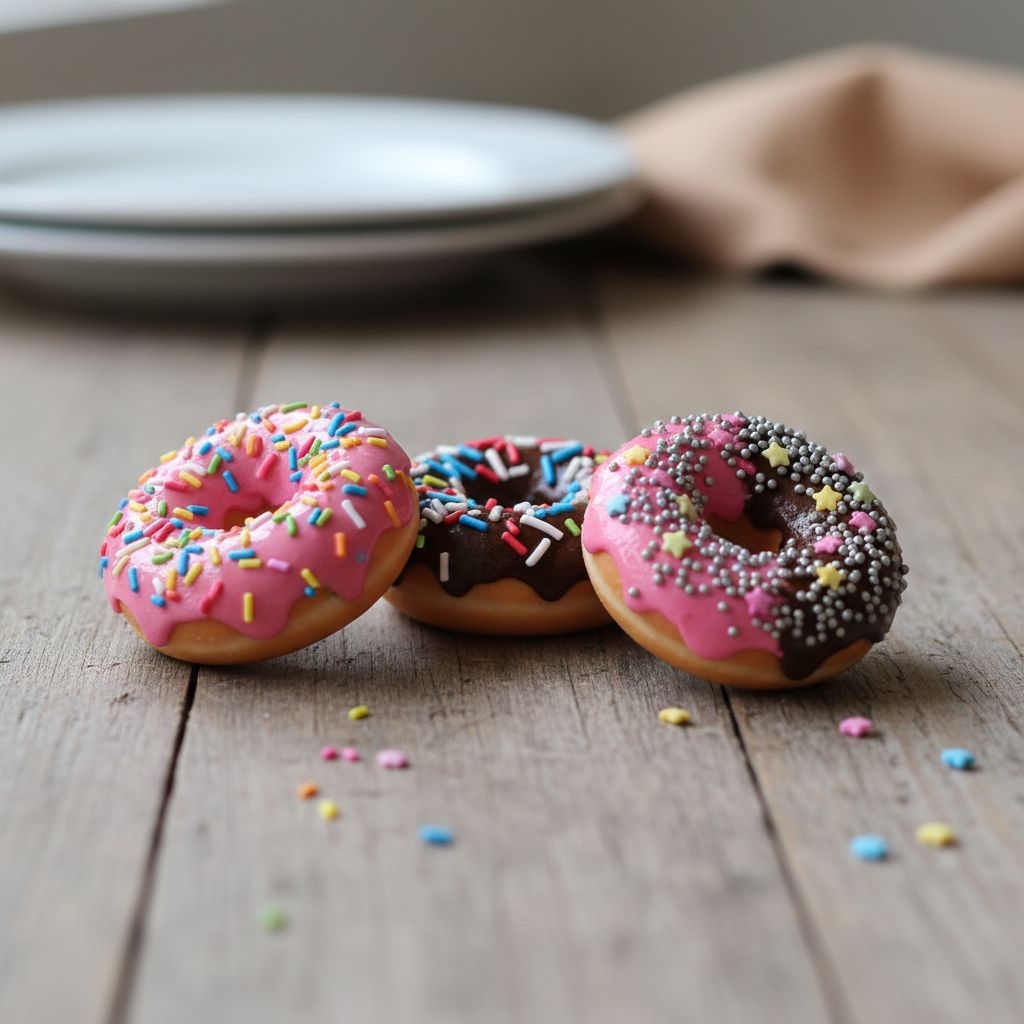
These delectable-looking faux treats are a feast for the eyes. By shaping smooth rings of clay and decorating them with dimensional ‘icing’ and ‘sprinkles,’ kids can create a set of refrigerator magnets that look good enough to eat, teaching them about texture and color layering.
Ingredients
| Ingredient | Amount |
|---|---|
| White Air Dry Clay | 100g |
| Acrylic Paint (Various Colors) | As needed |
| Glossy Mod Podge | 1 tbsp |
| Small Round Magnets | 4-6 units |
| Super Glue | Small drop |
Directions
- Portion the Dough: Divide the clay into small, walnut-sized balls.
- Shape the Base: Flatten slightly and press a hole in the center using the handle of a paintbrush to form a donut shape.
- Add Texture: Use a toothbrush to gently tap the surface for a baked cake texture.
- Dry and Decorate: Allow to dry for 24 hours. Paint a ‘base’ color, then paint a thick layer of contrasting color for ‘icing.’
- Garnish: Paint small dashes for sprinkles. Once dry, glue a magnet to the back.
Creativity #9: The Classic Pinch Pot Monster
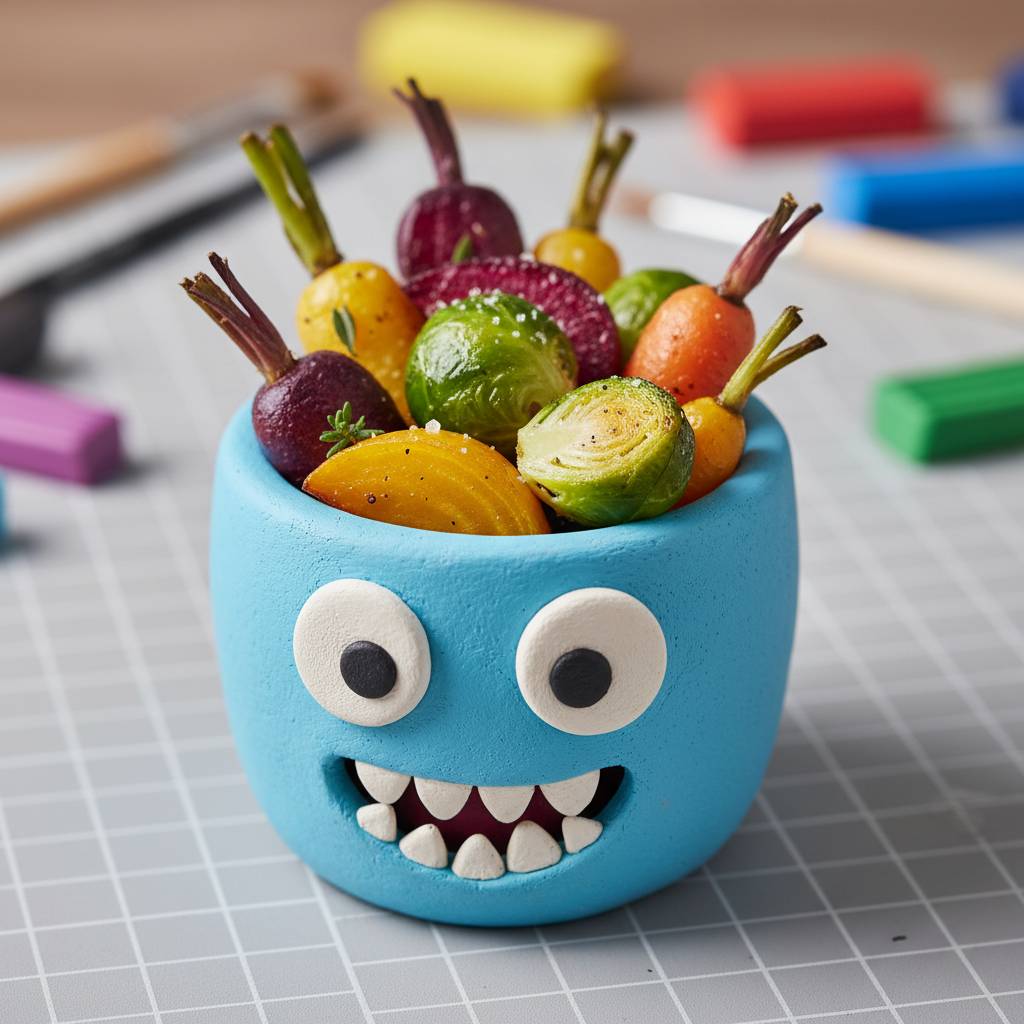
The pinch pot is the ‘sourdough starter’ of the clay world—a foundational technique. These pots are transformed into wide-mouthed monsters with jagged teeth and googly eyes, serving as perfect receptacles for erasers, coins, or other small treasures.
Ingredients
| Ingredient | Amount |
|---|---|
| Air Dry Clay | 200g |
| Water (for smoothing) | Small bowl |
| Plastic Eyes (Googly Eyes) | 2-4 pairs |
| Toothpicks | 5-10 units |
| Paints | As needed |
Directions
- Form the Ball: Roll a large chunk of clay into a smooth sphere.
- Pinch the Center: Insert a thumb into the center and pinch the walls while rotating to create a bowl shape.
- Sculpt Features: Roll tiny cones of clay for teeth and attach them to the rim using a drop of water. Add balls of clay for eyes.
- Texture: Use a toothpick to scratch ‘fur’ lines into the exterior.
- Finish: Let dry completely before painting in vibrant, monstrous colors.
Creativity #8: Stamped Botanical Coasters
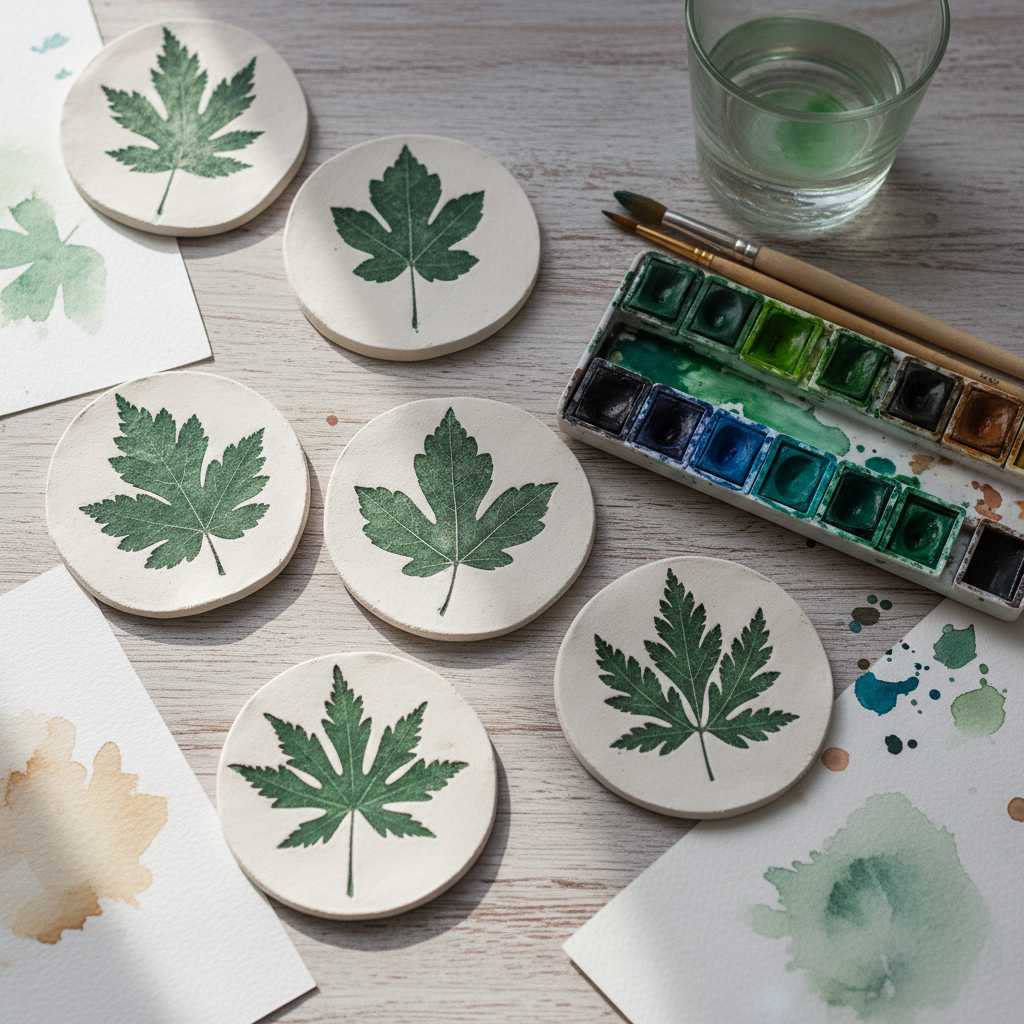
This project brings the outdoors into the studio. By pressing fresh leaves or flowers into flat discs of clay, children create fossil-like impressions that highlight the intricate veins of nature, resulting in sophisticated coasters perfect for gifting.
Ingredients
| Ingredient | Amount |
|---|---|
| Air Dry Clay | 300g |
| Fresh Leaves/Flowers | Handful |
| Rolling Pin | 1 unit |
| Round Cookie Cutter | 1 unit |
| Watercolor Paints | 1 set |
Directions
- Roll Out: Roll the clay onto a flat surface until it is about 1/4 inch thick.
- Press Ingredients: Arrange leaves on the clay and roll over them firmly with the rolling pin to embed the pattern.
- Cut: Use the cookie cutter to stamp out perfect circles around the leaf prints.
- Remove and Dry: Gently peel away the leaves to reveal the impression. Let dry for 24-48 hours.
- Glaze: Lightly paint with watercolors to highlight the veins, then seal with a clear varnish.
Creativity #7: Coiled Snake Pencil Holder
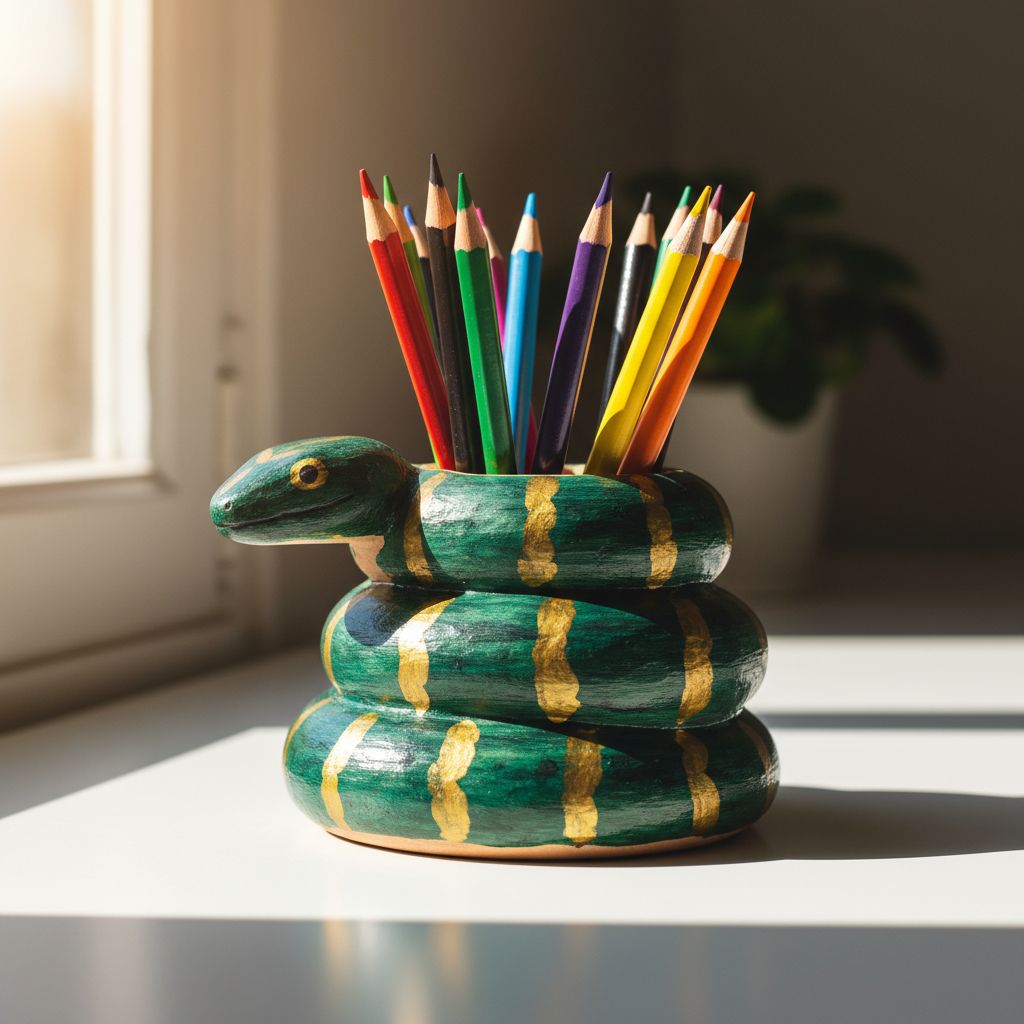
Using the coil technique—similar to rolling out gnocchi ropes—kids build a vertical structure. This winding snake pot is sturdy, functional, and allows for endless creativity in painting scales and patterns.
Ingredients
| Ingredient | Amount |
|---|---|
| Air Dry Clay | 400g |
| Water | Small cup |
| Scoring Tool (or plastic fork) | 1 unit |
| Acrylic Paints | Green/Yellow |
Directions
- Create the Base: Flatten a small ball of clay into a disc for the bottom.
- Roll Coils: Roll long, even ropes of clay (snakes) on the table.
- Stack and Score: Score (scratch) the edges of the base and the coil, add water, and spiral the coil upward to build walls.
- Sculpt Head: Fashion the end of the top coil into a snake head peering over the rim.
- Smooth or Keep: Choose to smooth the inside for stability while keeping the outside coiled for texture.
Creativity #6: Dinosaur Fossil Digs
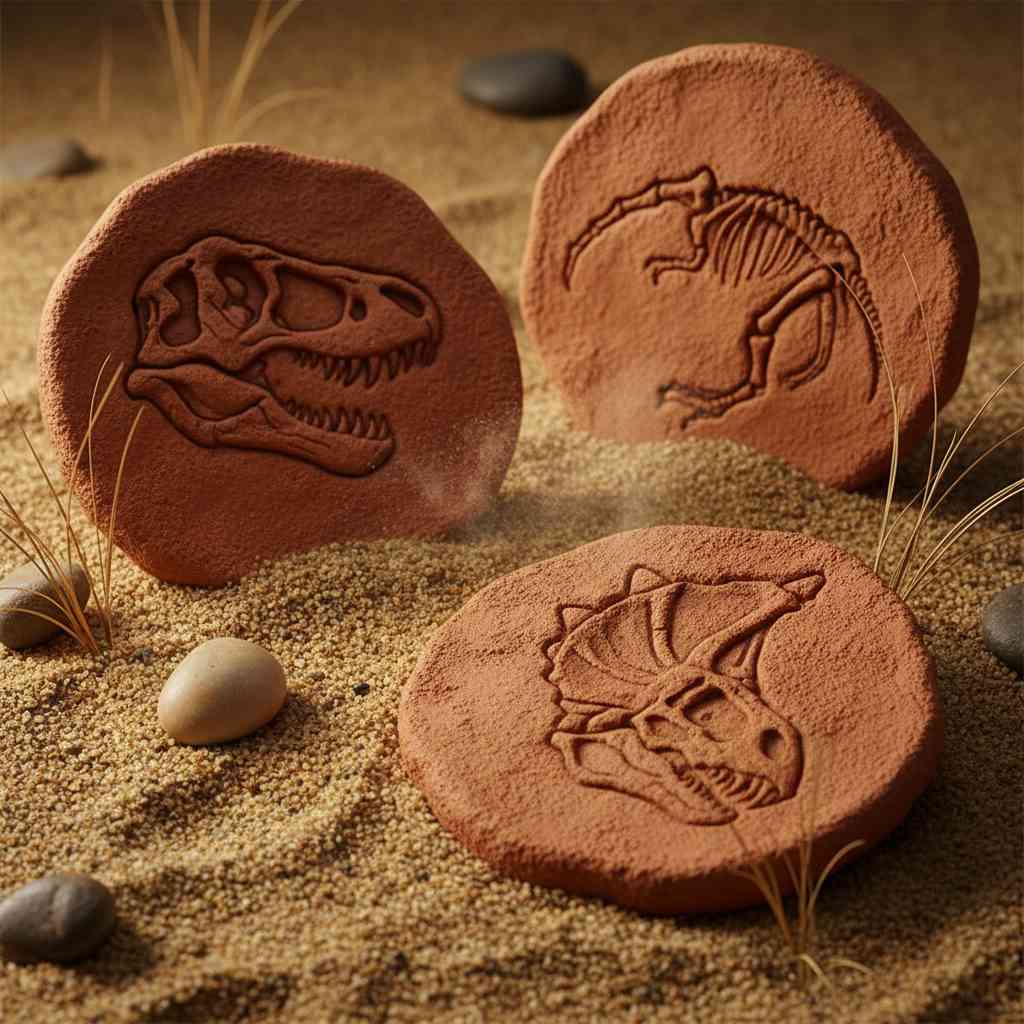
Perfect for the aspiring paleontologist, this project involves creating ‘ancient’ artifacts. By pressing plastic dinosaur toys into rough slabs of clay, kids create relief fossils that look like they were just excavated from the earth.
Ingredients
| Ingredient | Amount |
|---|---|
| Air Dry Clay (Terracotta color preferred) | 250g |
| Plastic Dinosaur Toys | 2-3 units |
| Coffee Grounds (optional texture) | 1 tbsp |
| Brown Paint (wash) | As needed |
Directions
- Prepare the Earth: Mix a little coffee grounds into the clay for a gritty texture, then flatten into irregular organic shapes.
- Fossilize: Press the side of a plastic dinosaur or its footprints firmly into the clay.
- Age the Edges: Rough up the edges to make it look like broken stone.
- Cure: Allow to dry completely.
- Antiquing: Paint a watered-down brown paint over the fossil and wipe off the surface, leaving dark paint in the crevices.
Creativity #5: Handprint Jewelry Dish
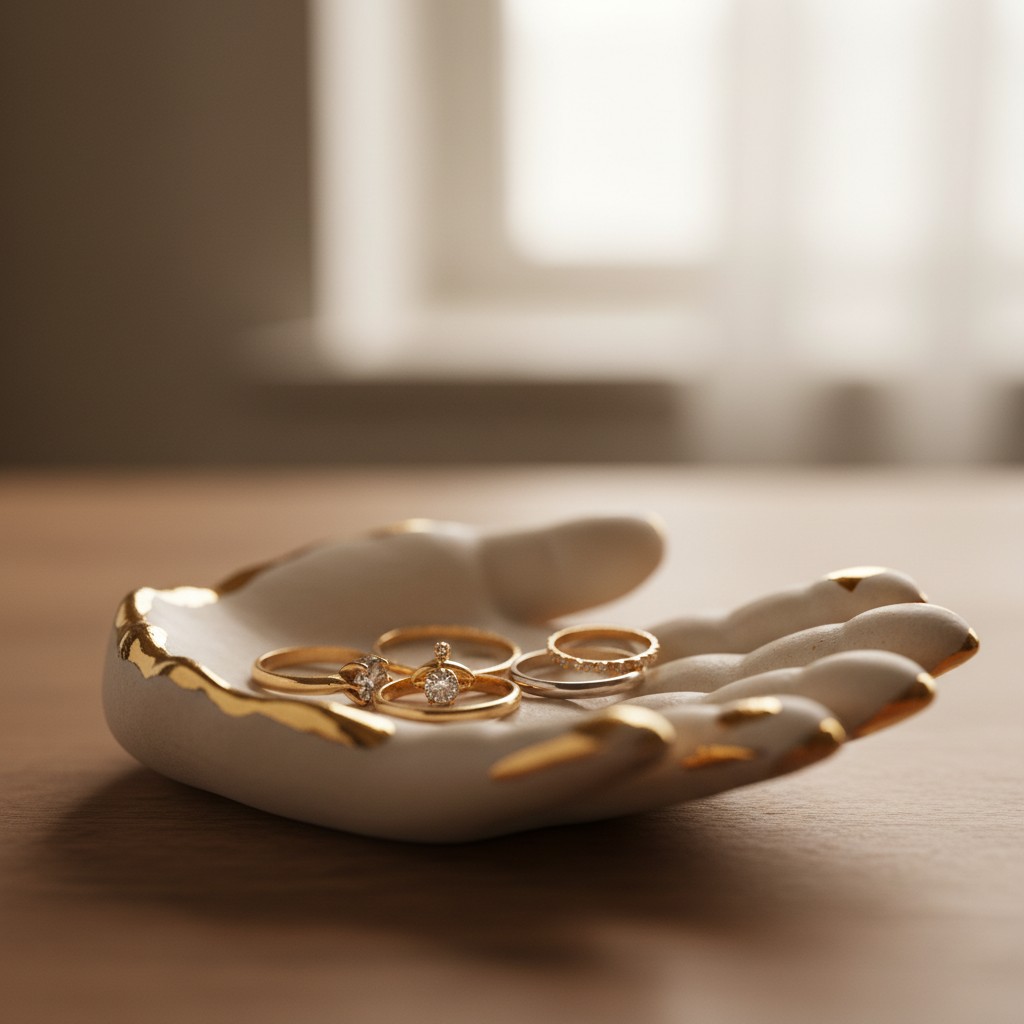
A sentimental favorite that captures a moment in time. The child’s hand serves as the mold for this curved dish, creating a personalized holder for rings, trinkets, or keys that parents will cherish forever.
Ingredients
| Ingredient | Amount |
|---|---|
| White Air Dry Clay | 300g |
| Rolling Pin | 1 unit |
| Craft Knife (Adult supervision) | 1 unit |
| Bowl (for shaping) | 1 unit |
| Gold Paint | Small amount |
Directions
- Roll and Trace: Roll out a slab of clay. Place the child’s hand on the clay and trace around it with a tool.
- Cut: Carefully cut out the hand shape using the craft knife.
- Form: Place the clay hand inside a curved bowl so the fingers curl upward slightly while drying.
- Dry: Allow to dry in the bowl for 24 hours to hold the curved shape.
- Garnish: Sand rough edges and paint the rim with metallic gold for a classy finish.
Creativity #4: Whimsical Mushroom Houses
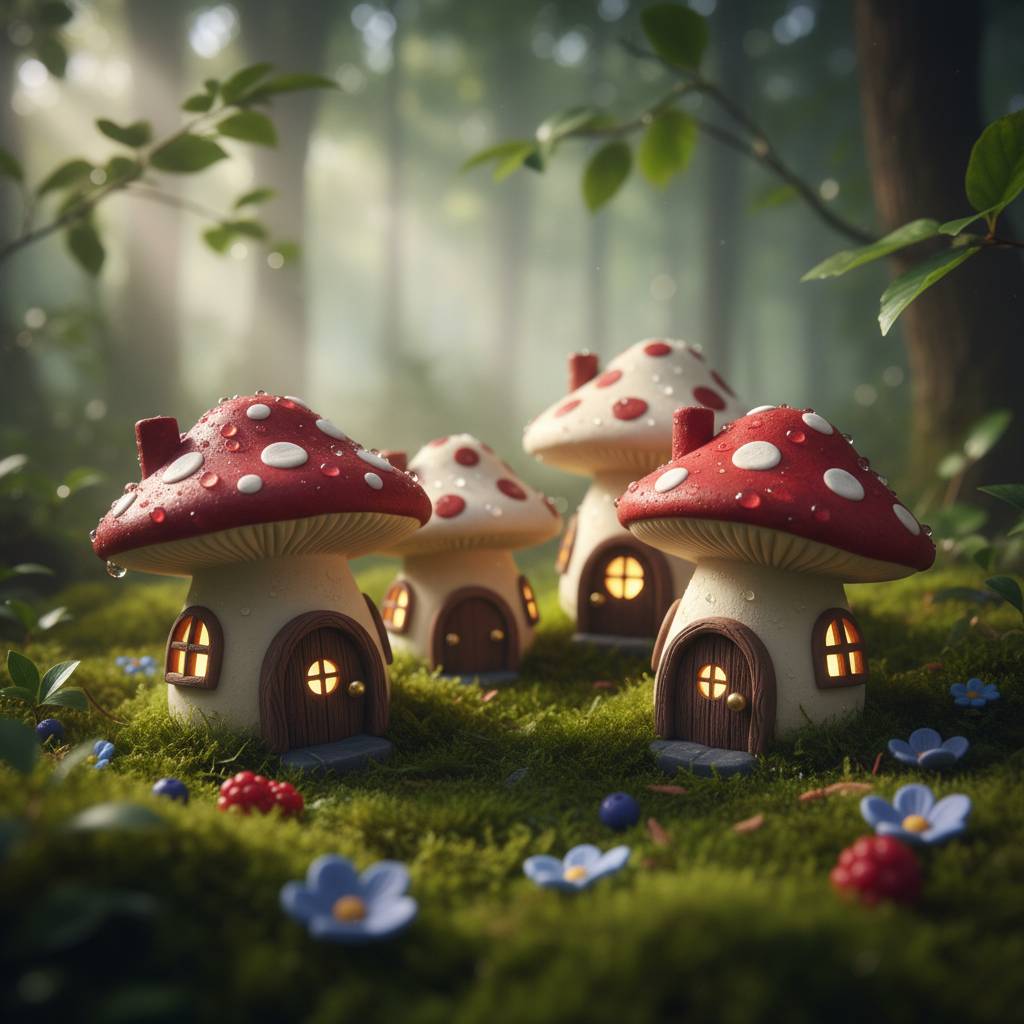
These enchanted little structures let imaginations run wild with fairy tale vibes. Combining a sturdy stem base with a polka-dotted cap, these mushrooms teach balance and joining techniques.
Ingredients
| Ingredient | Amount |
|---|---|
| Air Dry Clay | 150g |
| Aluminum Foil | 1 sheet |
| Red and White Paint | As needed |
| Toothpicks | 2 units |
Directions
- Armature: Crumple foil into a stem shape and a cap shape to save clay and reduce weight.
- Cover: Roll thin sheets of clay and cover the foil shapes completely, smoothing the seams.
- Assemble: Insert a toothpick into the stem and press the cap onto it (with a dab of water/clay slip) to join them.
- Detail: Add tiny clay balls for spots and carve a little door at the base.
- Paint: Once dry, paint the cap bright red with white dots and the stem a creamy white.
Creativity #3: Geometric Bead Necklace

Fashion meets sculpture in this wearable art project. Kids learn to shape precise geometric solids—cubes, spheres, and faceted gems—and string them into a chunky, colorful necklace.
Ingredients
| Ingredient | Amount |
|---|---|
| Air Dry Clay | 100g |
| Skewer or Knitting Needle | 1 unit |
| Sandpaper | 1 sheet |
| Cord or String | 1 length |
| Acrylic Paints | Various |
Directions
- Shape: Form clay into various shapes: balls, cubes, and cylinders. Use the table to flatten sides for a faceted look.
- Pierce: While the clay is wet, carefully twist a skewer through the center of each bead to create a hole.
- Refine: Once dry, use sandpaper to sharpen the geometric edges.
- Decorate: Paint each bead a different color or use color-blocking techniques.
- String: Thread the beads onto a cord to complete the jewelry.
Creativity #2: Starry Night Tealight Holder
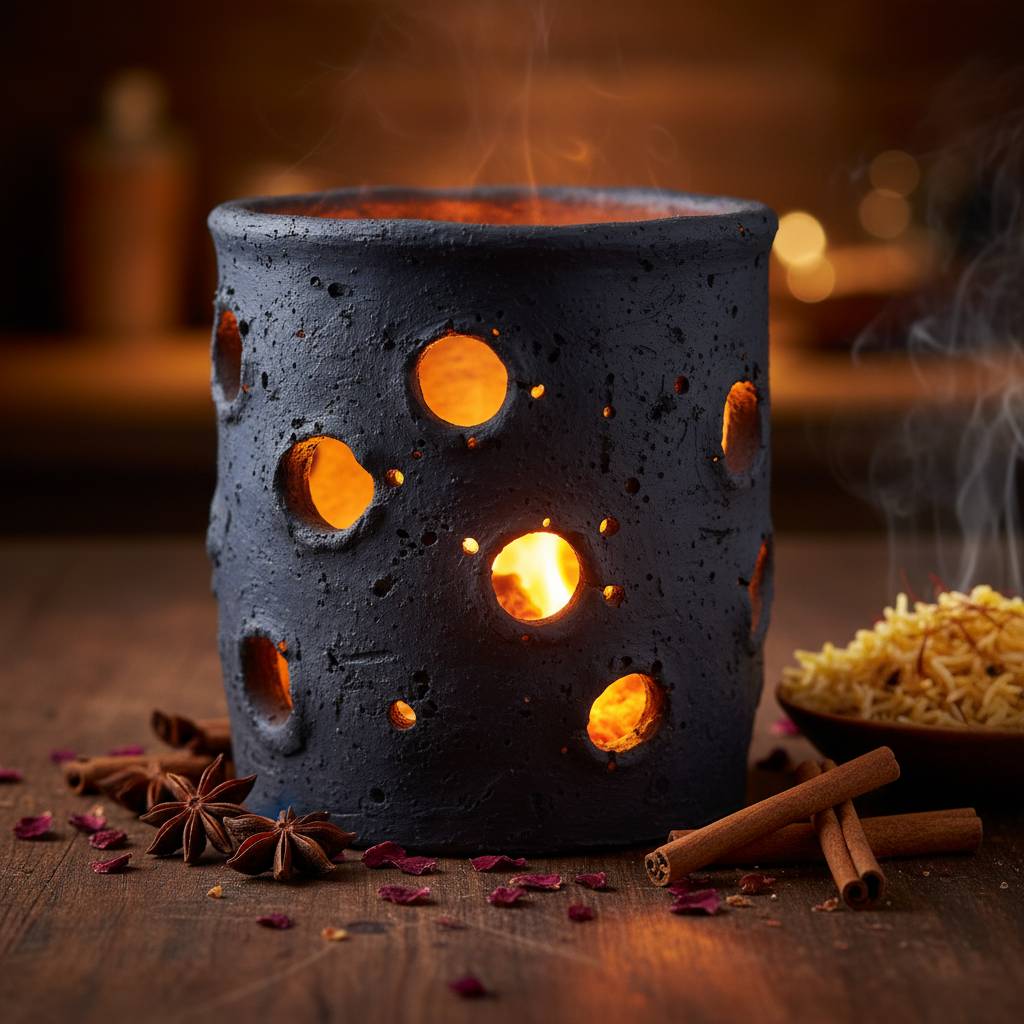
This project plays with light and shadow. By creating a cylinder and punching holes through it, kids create a luminary that projects starry patterns when placed over an LED candle.
Ingredients
| Ingredient | Amount |
|---|---|
| Air Dry Clay | 200g |
| Empty Can or Jar (as mold) | 1 unit |
| Plastic Straws (various sizes) | 2-3 units |
| LED Tea Light (Battery operated) | 1 unit |
Directions
- Roll Slab: Roll a long rectangle of clay.
- Cut Holes: Use plastic straws to punch holes (stars) out of the flat clay slab.
- Form Cylinder: Wrap the clay loosely around the can/jar (wrapped in parchment paper to prevent sticking) and join the seam.
- Remove Mold: Carefully slide the clay off the mold before it shrinks/dries completely.
- Illuminate: Once dry and painted (dark blue or black recommended), place over an LED tea light.
Creativity #1: Cute Cactus Friend
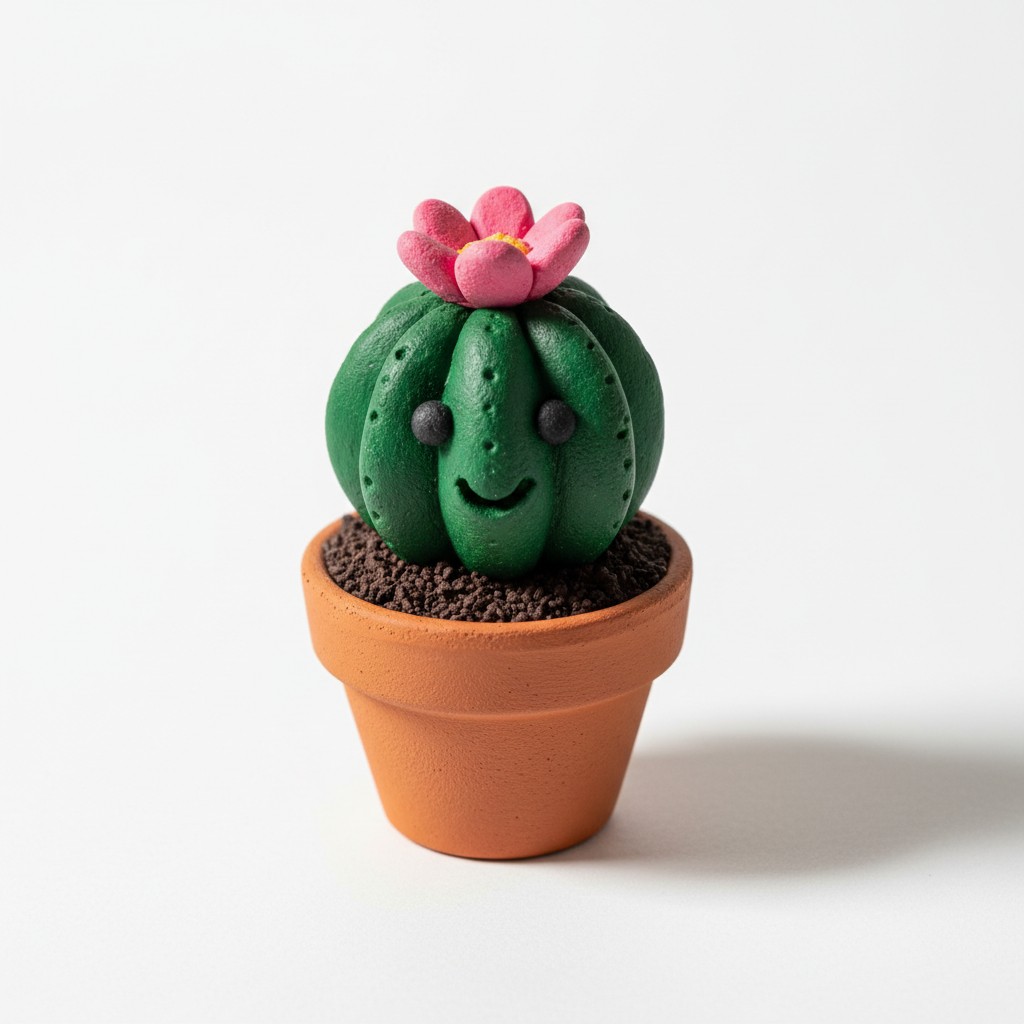
A zero-maintenance houseplant that adds character to any desk. This sculpting project involves creating rounded shapes and adding texture to simulate spines, resulting in a kawaii character that never needs watering.
Ingredients
| Ingredient | Amount |
|---|---|
| Air Dry Clay | 150g |
| Small Terracotta Pot | 1 unit |
| Green Paint | As needed |
| Pink Clay or Paint (for flower) | Small amount |
Directions
- Base: Fill the terracotta pot halfway with foil, then top with a layer of clay for ‘soil’.
- Sculpt Body: Form a smooth, oblong potato shape for the cactus body and attach it to the soil.
- Arms: Add smaller oblong shapes to the sides for cactus arms. Score and slip to attach.
- Texture: Use a toothpick to poke small holes all over for the ‘spines’. Add a small flower on top.
- Finish: Paint the cactus various shades of green and the soil brown.
Pro Tips
The Chef’s Secrets for Perfect Clay
Just like in baking, the quality of your results depends on technique. Here are the professional secrets to mastering air clay:
- Mise en Place: Keep a small bowl of water nearby. Air clay is water-based; if it starts to crack or feel dry while you are working, a wet finger is your best tool to smooth it back out. Think of it like icing a cake—smooth strokes yield the best finish.
- The “Score and Slip” Technique: Never just press two pieces of clay together; they will fall apart when dry. You must ‘score’ (scratch up) both surfaces with a toothpick, add a drop of water (‘slip’), and then press them together. This creates a mechanical bond, much like welding metal or knitting dough seams.
- Rotation is Key: When drying your projects, rotate them occasionally. If the top dries faster than the bottom, the uneven tension can cause warping or cracking. For flat items like coasters, dry them on a wire cooling rack to allow airflow underneath.
- The Glaze Finish: To get that professional, ceramic look without a kiln, seal your painted pieces with a coat of ‘Glossy Mod Podge’ or a spray acrylic sealer. This protects the paint and gives it a shine that mimics fired glaze.
- Reviving Stale Dough: If your unused clay starts to feel tough, knead in a few drops of water to refresh it before storing it in an airtight container with a damp paper towel.
Conclusion
There you have it a full course of creativity that transforms simple earth into treasured keepsakes. Working with air clay is more than just a craft; it is an exercise in patience, engineering, and artistic vision.
These 10 ideas are merely the starting point. Once your children master the basics of coiling, pinching, and joining, the menu of possibilities is endless.
So clear the table, roll up those sleeves, and let the sculpting begin!