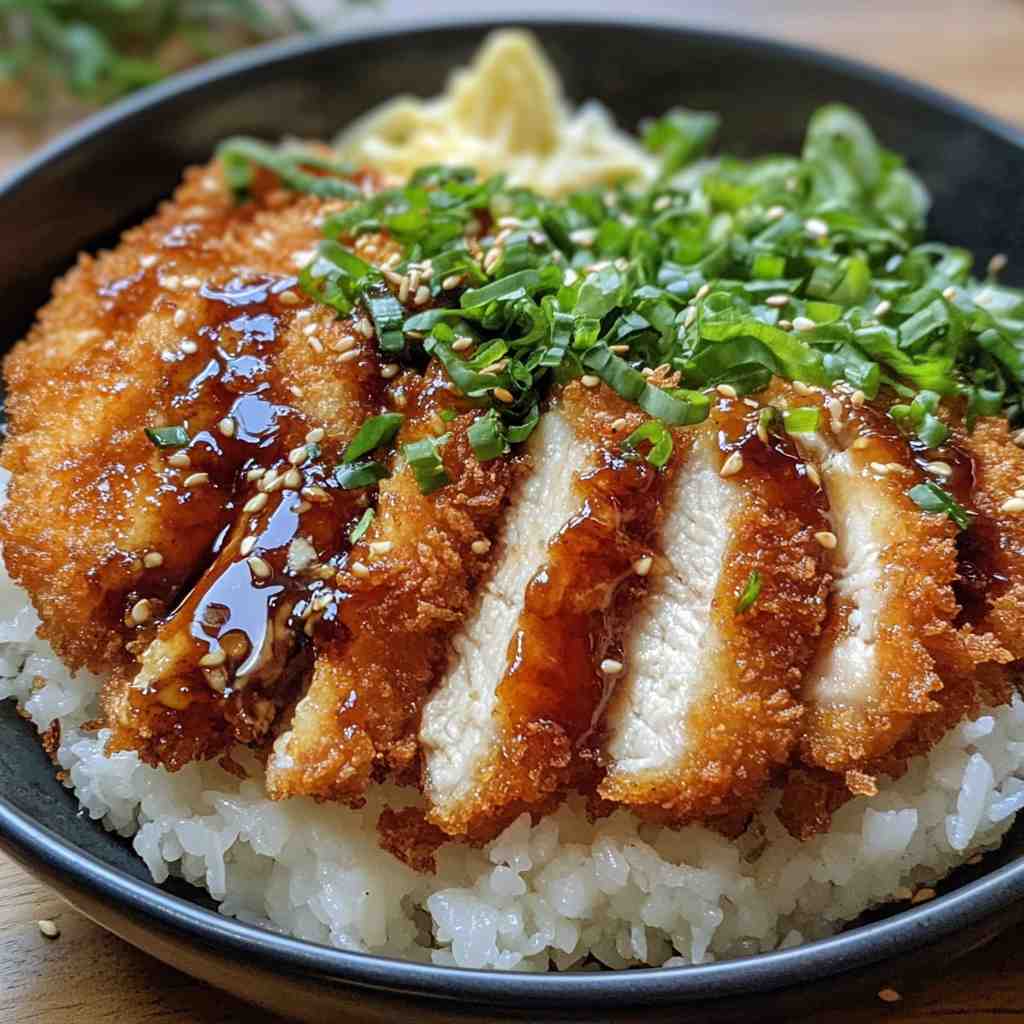
Imagine biting into a perfectly crisp, golden-brown exterior that gives way to reveal juicy, tender chicken – that’s the magic of chicken katsu. This beloved Japanese-inspired dish has captured the hearts (and taste buds) of food enthusiasts around the world, and for good reason. With its irresistible combination of textures and flavors, it’s no wonder chicken katsu has become a staple in kitchens everywhere.
Whether you’re a seasoned home cook or just starting to explore the world of Japanese cuisine, this chicken katsu recipe is a must-try. With its simple, straightforward preparation and accessible ingredients, it’s the perfect dish to elevate your culinary skills and impress your family and friends.
❤️ Why You’ll Love This Recipe ❓
Chicken katsu is beloved for its irresistible crunch and juicy, flavorful interior. The combination of a crisp, panko-breaded exterior and tender, succulent chicken creates a truly satisfying dining experience. What sets this recipe apart is the attention to detail in the preparation process, ensuring that every bite is a delightful balance of textures and flavors.
Beyond the taste, this chicken katsu recipe is also incredibly versatile. It can be served as a main dish, paired with a variety of accompaniments, or even repurposed in other recipes. Plus, the make-ahead possibilities make it an excellent choice for busy weeknights or meal-prep enthusiasts, allowing you to enjoy the convenience of a restaurant-quality meal with minimal effort.
🛒 What You Need to Prepare Crispy Chicken Katsu ❓
• 1 cup all-purpose flour
• 2 large eggs, beaten
• 2 cups panko breadcrumbs
• 1 teaspoon salt
• 1/2 teaspoon ground black pepper
• Vegetable oil for frying
The beauty of this chicken katsu recipe is that most ingredients are pantry or freezer staples. The combination of chicken, panko breadcrumbs, and a few simple seasonings creates the Japanese-inspired flavor profile that has made katsu recipes perennially popular.
📝 How to Make Crispy Chicken Katsu Step-by-Step ❓
• Step 2: Set up a breading station with three shallow dishes: one with the flour, one with the beaten eggs, and one with the panko breadcrumbs mixed with the salt and pepper.
• Step 3: Dredge the chicken in the flour, dip it in the egg, and then coat it evenly with the panko breadcrumb mixture, pressing gently to adhere.
• Step 4: In a large skillet, heat about 1/4 inch of vegetable oil over medium-high heat. Carefully add the breaded chicken and fry for 3-4 minutes per side, or until the coating is golden brown and crispy.
• Step 5: Transfer the fried chicken to a paper towel-lined plate to drain excess oil. Serve hot, with your desired accompaniments.
⏱️ Timing Overview
• Cooking time: 8-10 minutes
• Total time: 23-25 minutes
Compared to traditional tonkatsu (Japanese-style pork cutlet) which can take up to 30 minutes to prepare, this chicken katsu recipe saves you valuable time while delivering similar flavors and textures.
👩🏻⚕️ Nutritional Information
Per serving (based on 4 servings):
• Protein: 35g
• Carbohydrates: 31g
• Fat: 16g
• Fiber: 1g
• Sodium: 762mg
These crispy chicken katsu provide approximately 60% of your daily protein requirements and 30% of your daily carbohydrate needs, making them not just delicious but nutritionally valuable as well.
🔄 Healthier Alternatives for the Recipe
• Lower-carb version: Replace the panko with crushed pork rinds or a mixture of almond flour and parmesan cheese.
• Dairy-free adaptation: Use a plant-based milk, such as unsweetened almond or oat milk, in place of the eggs.
• Added protein: Serve the chicken katsu over a bed of steamed broccoli or cauliflower rice for an extra protein boost.
• Boost vegetables: Add shredded cabbage or carrot to the panko mixture for a nutrient-dense crunch.
These modifications can reduce calories by up to 20% or adapt the recipe for specific dietary needs without compromising the fundamental flavor profile of the chicken katsu.
🍽️ Serving Suggestions
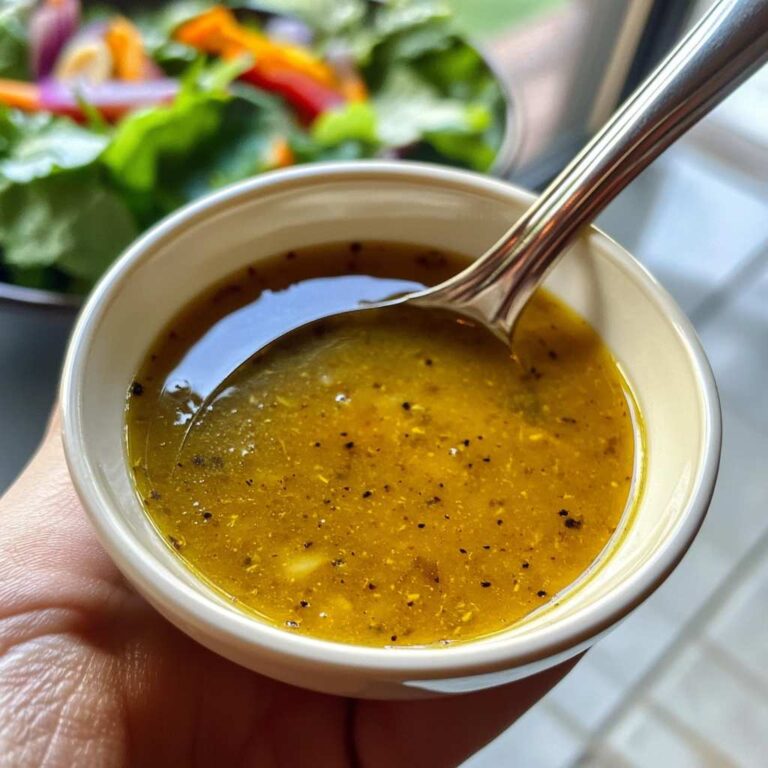
• Pair with a fresh, crisp salad or steamed vegetables for a complete, balanced meal.
• Complement the chicken katsu with a hot, comforting miso soup or a refreshing cucumber salad.
• For a family-style meal, serve the chicken katsu alongside other Japanese-inspired dishes like teriyaki salmon, vegetable tempura, or edamame.
• Create an appetizer or party platter by slicing the chicken katsu into smaller pieces and serving them with toothpicks or skewers.
❌ Common Mistakes to Avoid
• Overcrowding the pan: Frying the chicken in batches is crucial to maintain the crispness of the coating. Overcrowding the pan can lead to steaming instead of crisping.
• Undercooking: Ensuring the chicken is cooked through to an internal temperature of 165°F is essential for food safety and a juicy, tender texture.
• Skipping the pounding: Pounding the chicken breasts to an even thickness helps them cook evenly and prevents dry, overcooked edges.
• Not using fresh panko: Stale or old panko breadcrumbs can result in a soggy, less crisp coating. Fresh panko is key for that signature crunch.
🧊 Storing Tips for the Recipe
These crispy chicken katsu retain their quality remarkably well:
• Freezing unbaked: Prepare the breaded chicken in advance, then place on a baking sheet and freeze until firm. Transfer to a freezer-safe bag or container and store for up to 3 months. Thaw in the refrigerator before frying.
• Freezing baked: Allow the fried chicken katsu to cool completely, then wrap each piece individually in plastic wrap or foil. Freeze for up to 2 months. To reheat, bake at 400°F for 10-15 minutes, or until heated through and crispy.
• Reheating: For best results, reheat the chicken katsu in a preheated oven at 400°F for 5-7 minutes, or until piping hot and the coating is crisp. Avoid the microwave, as it can make the breading soggy.
❓ FAQs
Can I prepare the chicken katsu in advance?
Yes, you can prepare the breaded chicken katsu in advance and store it in the freezer for up to 3 months. Simply bread the chicken, place it on a baking sheet, and freeze until firm. Then, transfer the breaded chicken to a freezer-safe bag or container and store in the freezer. When ready to cook, thaw the chicken in the refrigerator before frying.
Can I substitute a different type of protein?
While chicken is the traditional protein used in chicken katsu, you can also use this breading and frying method with other types of protein, such as pork, turkey, or even firm tofu. Keep in mind that cooking times may need to be adjusted based on the thickness and density of the protein you choose.
Is there a way to make this recipe dairy-free?
Yes, you can easily make this chicken katsu recipe dairy-free by substituting plant-based milk, such as unsweetened almond or oat milk, in place of the eggs in the breading process. This will create a delicious, crispy coating without the use of dairy products.
Why is my chicken katsu not crisping up?
There are a few common reasons why your chicken katsu may not be crisping up as desired. Make sure you’re using fresh, dry panko breadcrumbs and that you’re not overcrowding the pan during frying. Additionally, ensure the oil is hot enough (around 350°F) and that you’re frying the chicken in batches to prevent steaming.
Can I add any extra flavors or seasonings to this recipe?
Absolutely! The beauty of this chicken katsu recipe is that it serves as a great base for all sorts of flavor variations. You can try adding spices like garlic powder, onion powder, or even a dash of cayenne pepper to the panko mixture. You can also experiment with different dipping sauces or serve the chicken katsu over a bed of seasoned rice or vegetables.
Conclusion
These crispy chicken katsu represent the perfect balance of convenience, flavor, and presentation. Whether you’re serving them as a main dish with steamed rice and vegetables or as the star of an impressive appetizer platter, they’re sure to impress with their irresistible crunch and juicy, tender interior. The versatility of this recipe allows for countless variations to suit your taste preferences and dietary needs.
With simple ingredients and straightforward preparation, these chicken katsu demonstrate that sophisticated flavors don’t require complicated techniques – just quality ingredients and a little bit of care in the frying process.
So why not embrace your inner Japanese culinary enthusiast and treat yourself and your loved ones to the delightful experience of homemade chicken katsu today?
Print
Crispy Chicken Katsu
- Total Time: 23-25 minutes
Ingredients
• 4 boneless, skinless chicken breasts
• 1 cup all-purpose flour
• 2 large eggs, beaten
• 2 cups panko breadcrumbs
• 1 teaspoon salt
• 1/2 teaspoon ground black pepper
• Vegetable oil for frying
Instructions
• Step 1: Pound the chicken breasts to an even thickness, about 1/2 inch thick. This will help ensure even cooking.
• Step 2: Set up a breading station with three shallow dishes: one with the flour, one with the beaten eggs, and one with the panko breadcrumbs mixed with the salt and pepper.
• Step 3: Dredge the chicken in the flour, dip it in the egg, and then coat it evenly with the panko breadcrumb mixture, pressing gently to adhere.
• Step 4: In a large skillet, heat about 1/4 inch of vegetable oil over medium-high heat. Carefully add the breaded chicken and fry for 3-4 minutes per side, or until the coating is golden brown and crispy.
• Step 5: Transfer the fried chicken to a paper towel-lined plate to drain excess oil. Serve hot, with your desired accompaniments.
- Prep Time: 15 minutes
- Cook Time: 8-10 minutes
- Category: Dinner
- Cuisine: Americans
Keywords: Chicken Katsu Recipe