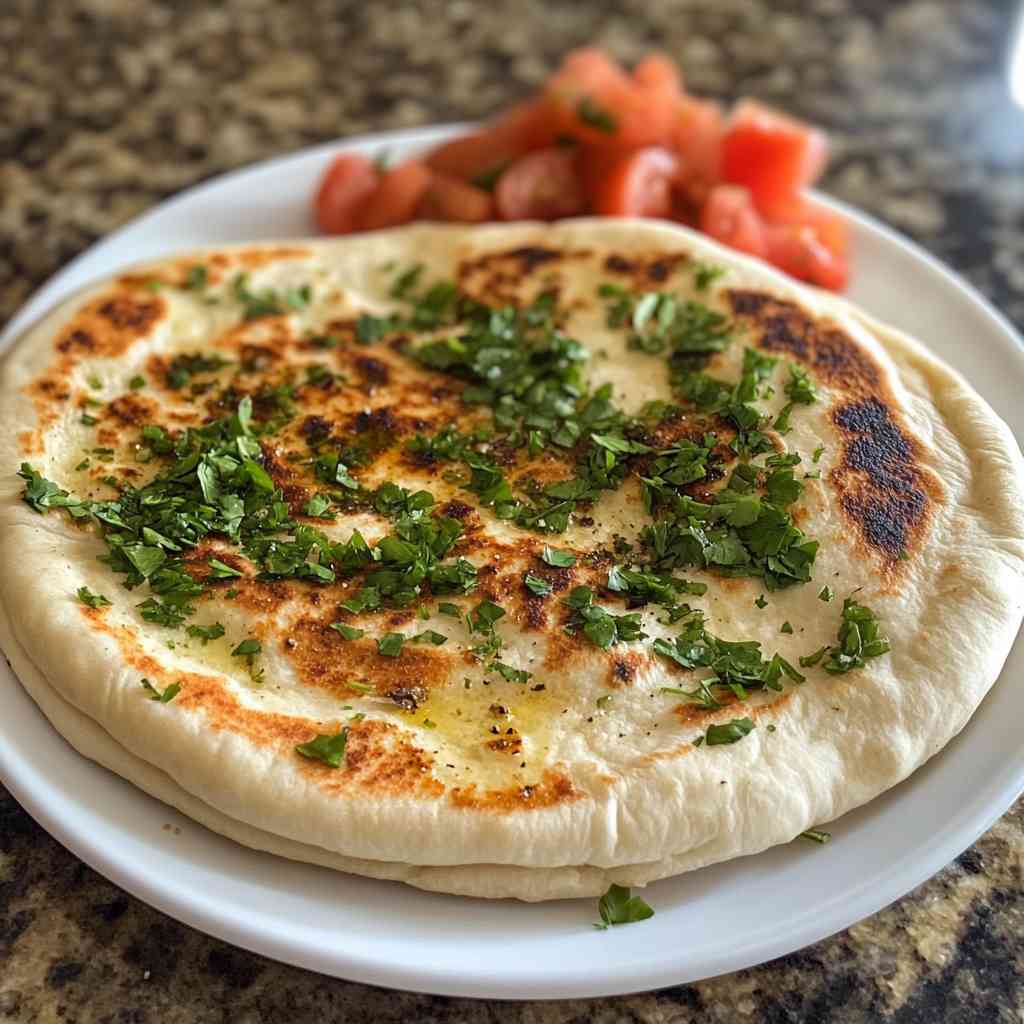
Imagine the aroma of freshly baked pita bread wafting through your kitchen, the steam rising as you tear open the golden-brown pockets, ready to be stuffed with your favorite fillings. This quick and easy pita bread recipe is about to transform your culinary experience, bringing the flavors of the Middle East right to your table.
Pita bread has long been a staple in many cultures, prized for its versatility and irresistible texture. But what if I told you that you can master this delightful bread in the comfort of your own home, with just a handful of simple ingredients and a bit of time? Get ready to impress your friends and family with your homemade pita bread skills.
In this comprehensive guide, we’ll uncover the secrets behind creating the perfect pita, from the science behind the dough to the techniques that will have you baking like a pro. So, let’s dive in and unlock the magic of homemade pita bread!
✨ The Secret Behind This Irresistible Dish
The key to creating truly exceptional pita bread lies in the delicate balance of ingredients and the careful attention to detail during the baking process. Unlike store-bought versions, which can sometimes feel heavy or dense, this recipe yields pitas that are light, airy, and wonderfully chewy.
The secret is in the combination of high-quality bread flour and a touch of yogurt or milk. The bread flour provides the necessary gluten structure to support the pockets, while the dairy ingredient adds a subtle tang and softness to the crumb. Additionally, the careful proofing and baking techniques ensure that the pitas puff up beautifully, creating the signature pockets that are perfect for stuffing.
Ingredients
• 1 teaspoon (5g) salt
• 1 teaspoon (5g) instant yeast or active dry yeast
• 1 1/4 cups (300ml) warm water
• 1/4 cup (60ml) plain yogurt or milk
• 1 tablespoon (15ml) olive oil, plus more for greasing
The bread flour is the key to achieving the perfect texture for pita bread. Its higher protein content helps create the chewy, yet light, interior. The yogurt or milk adds a subtle tang and tenderness to the dough, while the olive oil helps tenderize the crust.
Instructions
- Activate the Yeast: In a medium bowl, combine the warm water and yeast. Let the mixture sit for 5-10 minutes until the yeast is foamy and activated.
- Make the Dough: In a large bowl, whisk together the bread flour and salt. Create a well in the center and pour in the activated yeast mixture, yogurt or milk, and olive oil. Using a wooden spoon or your hands, gradually incorporate the dry ingredients into the wet ingredients until a shaggy dough forms.
- Knead the Dough: Turn the dough out onto a lightly floured surface and knead for 5-7 minutes, until the dough becomes smooth, elastic, and not sticky. Add more flour as needed if the dough is too sticky.
- First Rise: Place the dough in a lightly greased bowl, cover with a damp towel or plastic wrap, and let it rise in a warm place for 1-1.5 hours, or until it has doubled in size.
- Punch Down and Divide: Once the dough has risen, punch it down to release any air bubbles. Divide the dough into 8 equal pieces and shape each piece into a smooth ball.
- Roll Out the Pitas: On a lightly floured surface, use a rolling pin to roll each dough ball into a thin round circle, about 1/4-inch thick. Be gentle and avoid over-rolling, as this can prevent the pitas from puffing properly.
- Bake the Pitas: Preheat your oven to 450°F (230°C) and place a baking steel or baking sheet in the oven to heat up. Working in batches, carefully transfer the rolled-out pitas onto the preheated baking surface. Bake for 3-5 minutes, or until the pitas are puffed up and lightly golden brown. Avoid opening the oven too often, as this can prevent the pitas from puffing.
- Cool and Serve: Remove the baked pitas from the oven and let them cool on a wire rack for a few minutes before serving. Enjoy your freshly baked pita bread with your favorite fillings, dips, or alongside your meal.
Timing Overview
• Cook time: 3-5 minutes per batch
• Chill time: None
• Baking time: 3-5 minutes
• Freezing time: N/A
• Marinating time: N/A
• Cooling time: 5-10 minutes
• Blend time: N/A
• Total Time: 45-60 minutes
Nutritional Information
Nutritional information is an estimate per serving, based on 8 servings.
• Protein: 6 g
• Sodium: 350 mg
• Carbohydrates: 40 g
• Fat: 3 g
• Fiber: 2 g
💡 How to Customize This Recipe ?
• To Make it Vegan: Substitute the yogurt or milk with a plant-based yogurt or unsweetened almond milk. Omit the honey and use agave or maple syrup instead.
• To Add a Spicy Kick: Incorporate 1-2 teaspoons of ground cumin, paprika, or cayenne pepper into the dough for a subtle heat. You can also serve the pitas with a zesty garlic-herb sauce or chili-infused olive oil.
🥗 Finishing Touches and Serving Ideas
• Garnish Suggestions: Garnish the pitas with a sprinkle of za’atar seasoning, a drizzle of tahini sauce, and a few slices of fresh cucumber and tomato.
• Beverage Pairing: This pita bread pairs wonderfully with a refreshing glass of mint-infused lemonade or a crisp white wine, like a Sauvignon Blanc or Albariño.
🔍 Troubleshooting Common Recipe Issues
• Mistake 2 – Using Cold Ingredients: Make sure all of your ingredients, especially the water and yogurt or milk, are at room temperature before starting. Cold ingredients can hinder the yeast’s ability to activate and the dough’s ability to rise, leading to dense, tough pitas.
• Mistake 3 – Not Preheating the Oven Properly: Ensuring your oven is hot enough, with the baking steel or sheet preheated, is crucial for the pitas to puff up. If the oven is not hot enough, the pitas may not rise or develop the signature pockets.
🧊 Storing, Freezing, and Reheating
• Freezing: To freeze, wrap the pitas individually in plastic wrap or foil, then place them in a resealable freezer bag. Freeze for up to 3 months.
• Reheating: To reheat, place the pitas on a baking sheet and warm them in a 350°F (175°C) oven for 5-10 minutes, or until heated through and slightly crisp.
❓ FAQs
Can I use all-purpose flour instead of bread flour?
While you can use all-purpose flour, the pitas may not puff up as dramatically or have the same chewy texture as those made with bread flour. The higher protein content in bread flour helps create the signature pockets and structure of pita bread.
How can I tell if the pitas are done baking?
The pitas are ready when they have puffed up and are lightly golden brown on the top and bottom. You can also check the internal temperature, which should read around 205-210°F (96-99°C) when the pitas are fully cooked.
Can I make the dough ahead of time?
Yes, you can make the pita dough in advance. After the first rise, punch down the dough, cover it, and refrigerate for up to 3 days. When ready to bake, remove the dough from the fridge, divide and shape it, and then proceed with the remaining steps.
Why did my pitas not puff up?
There are a few possible reasons why the pitas didn’t puff up properly: 1) The dough was overworked, causing the gluten to become too developed; 2) The oven wasn’t hot enough, preventing the rapid steam expansion; or 3) The pitas were overcrowded on the baking surface, leading to steaming instead of baking.
Can I use a stand mixer to knead the dough?
Absolutely! Using a stand mixer with a dough hook attachment can make the kneading process much easier. Mix the ingredients on medium speed for 5-7 minutes, until the dough becomes smooth and elastic.
✍️ A Final Word from Our Kitchen
Mastering the art of homemade pita bread is a true culinary delight. This quick and easy recipe allows you to bring the flavors of the Middle East into your own kitchen, filling your home with the enticing aroma of freshly baked pitas. Whether you’re serving them as a side, using them for sandwiches, or enjoying them with your favorite dips and spreads, these pitas are sure to impress.
So, what are you waiting for? Gather your ingredients, fire up your oven, and get ready to bake up a batch of these irresistible pitas. With a little practice, you’ll be turning out pillowy, puffed-up pockets of goodness that will have your friends and family begging for more. Bon appétit!

Quick and Easy Pita Bread Recipe
⏱️ Timing Overview
🥘 Ingredients
📝 Instructions
- In a medium bowl, combine the warm water and yeast. Let the mixture sit for 5-10 minutes until the yeast is foamy and activated.
- In a large bowl, whisk together the bread flour and salt. Create a well in the center and pour in the activated yeast mixture, yogurt or milk, and olive oil. Using a wooden spoon or your hands, gradually incorporate the dry ingredients into the wet ingredients until a shaggy dough forms.
- Turn the dough out onto a lightly floured surface and knead for 5-7 minutes, until the dough becomes smooth, elastic, and not sticky. Add more flour as needed if the dough is too sticky.
- Place the dough in a lightly greased bowl, cover with a damp towel or plastic wrap, and let it rise in a warm place for 1-1.5 hours, or until it has doubled in size.
- Once the dough has risen, punch it down to release any air bubbles. Divide the dough into 8 equal pieces and shape each piece into a smooth ball.
- On a lightly floured surface, use a rolling pin to roll each dough ball into a thin round circle, about 1/4-inch thick. Be gentle and avoid over-rolling, as this can prevent the pitas from puffing properly.
- Preheat your oven to 450°F (230°C) and place a baking steel or baking sheet in the oven to heat up. Working in batches, carefully transfer the rolled-out pitas onto the preheated baking surface. Bake for 3-5 minutes, or until the pitas are puffed up and lightly golden brown. Avoid opening the oven too often, as this can prevent the pitas from puffing.
- Remove the baked pitas from the oven and let them cool on a wire rack for a few minutes before serving. Enjoy your freshly baked pita bread with your favorite fillings, dips, or alongside your meal.