Pumpkin pie is a beloved dessert that embodies the cozy flavors of fall. However, many traditional recipes call for the use of evaporated milk, which can be hard to find or simply not preferred by some home cooks. Fear not, our classic pumpkin pie recipe delivers all the indulgent taste and velvety texture you crave, without the need for evaporated milk. Prepare to be wowed by this irresistible, homemade version that will have your guests raving.
As the autumn breeze whispers outside and the leaves begin to drift to the ground, there’s nothing quite like the aroma of a freshly baked pumpkin pie wafting through the kitchen. The warming spices of cinnamon, ginger, and nutmeg mingle with the rich, creamy custard filling, creating a symphony of flavors that instantly transport you to a cozy, comforting place. This classic pumpkin pie is the epitome of fall indulgence, and it’s about to become your new holiday go-to.
Whether you’re hosting a Thanksgiving feast or craving a sweet treat on a chilly evening, this pumpkin pie recipe without evaporated milk is sure to delight. With its flawless balance of spices, velvety texture, and perfectly crisp crust, it’s a true standout in the world of pumpkin desserts. Get ready to savor every bite of this homemade masterpiece.
The Secret Behind This Irresistible Dish
The secret to this exceptional pumpkin pie lies in the carefully selected ingredients and the attention to detail in the preparation. Instead of relying on evaporated milk, which can sometimes result in a heavier, denser texture, we’ve crafted a silky-smooth filling using a combination of heavy cream and whole milk. This unique blend creates a luxurious mouthfeel that simply melts in your mouth, without any grittiness or artificial aftertaste.
But the real magic happens in the spice blend. We’ve carefully curated a harmonious mix of warm cinnamon, zesty ginger, fragrant nutmeg, and a touch of allspice to elevate the natural sweetness of the pumpkin. The result is a flavor profile that is both comforting and captivating, with each bite revealing new layers of complexity. This pumpkin pie is truly a cut above the rest, setting a new standard for this beloved dessert.
Ingredients
• 1 cup heavy cream
• 3/4 cup whole milk
• 3 large eggs
• 1 cup granulated sugar
• 1 1/2 teaspoons ground cinnamon
• 1 teaspoon ground ginger
• 1/2 teaspoon ground nutmeg
• 1/4 teaspoon ground allspice
• 1/4 teaspoon salt
• 1 unbaked 9-inch pie crust
The combination of heavy cream and whole milk in this recipe is the key to achieving a rich, velvety texture without the use of evaporated milk. The heavy cream adds a luscious, creamy mouthfeel, while the whole milk provides a perfectly balanced dairy base. This ratio of dairy ingredients ensures the filling is not overly dense or heavy, but instead, delightfully smooth and indulgent.
Instructions
- Prepare the Pie Crust: Roll out the unbaked pie crust and transfer it to a 9-inch pie plate. Crimp the edges to create a decorative border. Refrigerate the crust while you prepare the filling.
- Make the Filling: In a large bowl, whisk together the pumpkin puree, heavy cream, whole milk, eggs, granulated sugar, cinnamon, ginger, nutmeg, allspice, and salt until well combined and smooth.
- Bake the Pie: Preheat your oven to 375°F (190°C). Pour the filling into the prepared pie crust. Bake for 50-60 minutes, or until the center is almost set. The pie should still have a slight jiggle in the center when done. Cover the edges of the crust with foil or a pie shield if they start to brown too quickly.
- Cool and Chill: Remove the pie from the oven and allow it to cool completely on a wire rack, about 2-3 hours. Once cooled, refrigerate the pie for at least 4 hours, or up to 3 days, before serving.
Timing Overview
• Cook time: 50-60 minutes
• Chill time: 4 hours
• Total Time: 5 hours 15 minutes
Nutritional Information
Nutritional information is an estimate per serving, based on 8 servings.
• Protein: 6 g
• Sodium: 280 mg
• Carbohydrates: 45 g
• Fat: 21 g
• Fiber: 2 g
Recipe Adaptations for Every Diet
Perfect Pairings and Serving Suggestions
How to Sidestep Common Cooking Pitfalls?
How to Keep Your Leftovers Fresh?
• Freezing: Pumpkin pie can be frozen for up to 3 months. Wrap the entire pie tightly in plastic wrap, then aluminum foil, and store in the freezer. Thaw in the refrigerator before serving.
FAQs
Can I use fresh pumpkin instead of canned puree?
Absolutely! To use fresh pumpkin, you’ll need to roast and puree about 1 1/2 cups of fresh pumpkin. The process is a bit more time-consuming, but the flavor and texture of homemade pumpkin puree can be incredibly rewarding. Just be sure to adjust the baking time, as fresh pumpkin may release more moisture than canned puree.
Can I make this pumpkin pie a day in advance?
Yes, this pumpkin pie can be made a day in advance. Simply bake the pie, allow it to cool completely, and then refrigerate it for up to 3 days before serving. This will allow the flavors to meld and the texture to set up perfectly. Just be sure to cover the pie tightly with plastic wrap or foil to prevent it from drying out in the fridge.
How can I prevent the crust from getting soggy?
To prevent a soggy crust, there are a few key tips to follow. First, make sure to prebake the crust before adding the filling, as this will help create a barrier against the moisture. Second, be careful not to overfill the crust, as excess filling can lead to a soggy bottom. Finally, consider using a pie shield or foil ring to protect the edges of the crust from over-browning during the long baking time.
Can I use a store-bought pie crust?
Yes, you can absolutely use a store-bought pie crust for this recipe. Just be sure to follow the package instructions for pre-baking the crust before adding the filling. This will ensure a flaky, crisp texture that complements the rich pumpkin filling perfectly.
How can I tell when the pumpkin pie is fully baked?
The best way to tell when your pumpkin pie is fully baked is to check the center. The center of the pie should be almost completely set, with just a slight jiggle when you gently shake the pan. The edges should be puffed up and golden brown. If the center is still very liquid-y, continue baking in 5-minute intervals until it reaches the desired doneness.
Final Thoughts on This Amazing Recipe
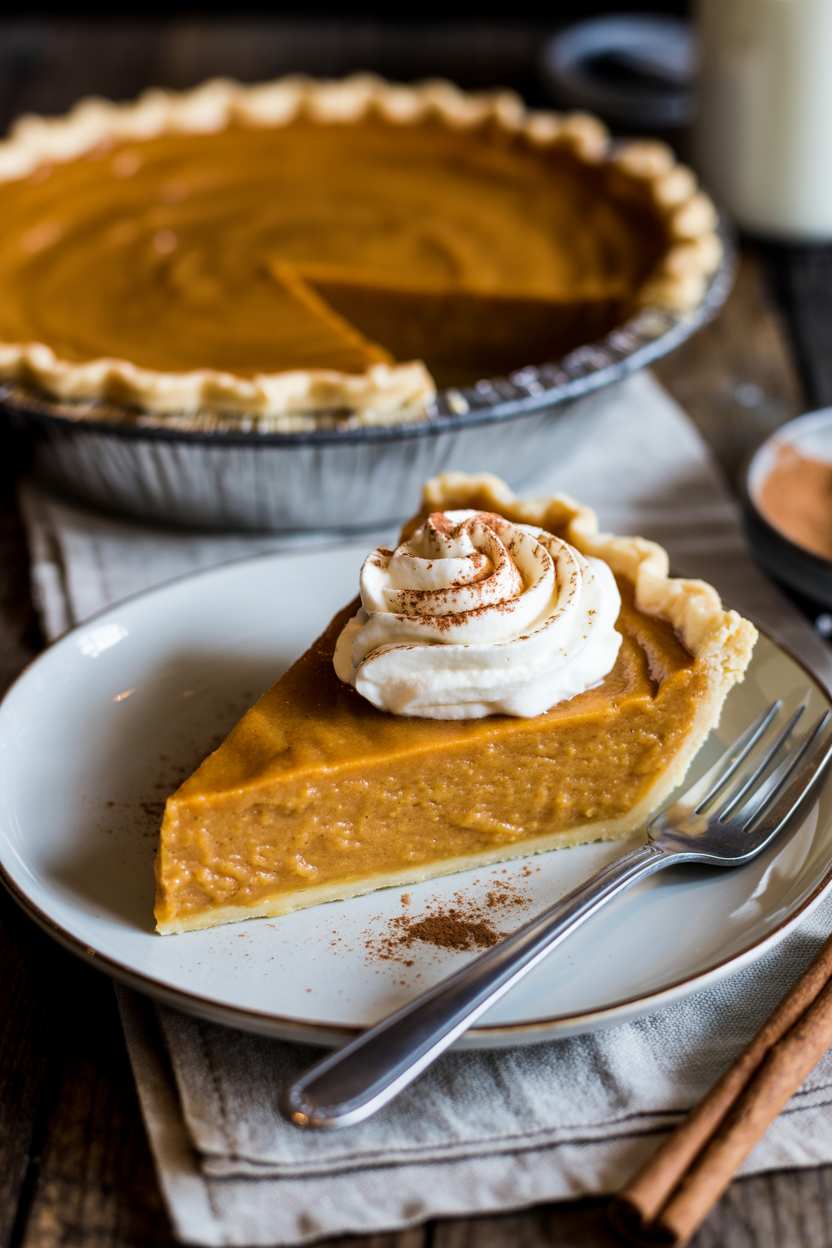
This classic pumpkin pie without evaporated milk is a true showstopper that will have your guests raving. The combination of a buttery, flaky crust and a rich, velvety filling is simply irresistible. Whether you’re serving it as the grand finale to your Thanksgiving feast or enjoying a cozy slice on a chilly autumn evening, this pumpkin pie is sure to become a new family favorite. So go ahead, indulge in a slice (or two!) and savor the comforting flavors of the season.
As you take your first bite, let the warmth of the spices and the silky-smooth texture transport you to a world of pure pumpkin bliss. This is a dessert that truly celebrates the essence of fall, and it’s one that you’ll want to make again and again. So gather your ingredients, preheat your oven, and get ready to bake up a batch of this incredible pumpkin pie. Your taste buds (and your loved ones) will thank you!
🥧 The Classic, Best Pumpkin Pie Recipe Without Evaporated Milk
⏱️ Timing Overview
🥘 Ingredients
📝 Instructions
- Roll out the unbaked pie crust and transfer it to a 9-inch pie plate. Crimp the edges to create a decorative border. Refrigerate the crust while you prepare the filling.
- In a large bowl, whisk together the pumpkin puree, heavy cream, whole milk, eggs, granulated sugar, cinnamon, ginger, nutmeg, allspice, and salt until well combined and smooth.
- Preheat your oven to 375°F (190°C). Pour the filling into the prepared pie crust. Bake for 50-60 minutes, or until the center is almost set. The pie should still have a slight jiggle in the center when done. Cover the edges of the crust with foil or a pie shield if they start to brown too quickly.
- Remove the pie from the oven and allow it to cool completely on a wire rack, about 2-3 hours. Once cooled, refrigerate the pie for at least 4 hours, or up to 3 days, before serving.