Ah, the humble pumpkin pie crust – a foundation so often overlooked, yet it holds the key to unlocking the true potential of this beloved autumnal treat. In this comprehensive guide, we’ll unveil the secrets to crafting a classic, hearty pumpkin pie crust that will have your guests raving.
Picture a rich, golden-hued crust that perfectly complements the velvety pumpkin filling, creating a harmonious balance of flavors and textures. This is no ordinary pumpkin pie – this is a culinary experience that will transport you straight to the heart of a cozy, fall-scented kitchen.
So, let’s dive in and uncover the magic behind this irresistible dish!
🥧 The Secret Behind This Irresistible Dish
The secret to this pumpkin pie crust recipe lies in the perfect blend of ingredients and the meticulous attention to detail. Unlike many store-bought or pre-made crusts, this homemade version is made with quality, wholesome ingredients that lend a heartier, more satisfying texture.
The use of a combination of all-purpose flour and whole wheat flour adds a delightful nutty undertone, while the generous helping of butter provides a rich, flaky base. The addition of a touch of sugar and a pinch of salt perfectly balances the flavors, creating a crust that is both savory and subtly sweet.
Ingredients
• 3/4 cup whole wheat flour
• 1 tsp salt
• 1 tbsp granulated sugar
• 1 cup unsalted butter, chilled and cubed
• 3-5 tbsp ice water
The key to this crust’s exceptional texture lies in the use of both all-purpose and whole wheat flours. The all-purpose flour provides structure and a tender crumb, while the whole wheat flour adds a heartier, more robust flavor profile. The combination of these two flours creates a crust that is both delicate and satisfying.
Instructions
- Make the Dough: In a large bowl, whisk together the all-purpose flour, whole wheat flour, salt, and sugar. Add the chilled, cubed butter and use a pastry cutter or your fingers to work the butter into the dry ingredients until the mixture resembles coarse crumbs with some pea-sized pieces of butter remaining. Gradually add the ice water, 1 tablespoon at a time, and mix gently with a fork until the dough just begins to come together. Do not overmix.
- Chill the Dough: Shape the dough into a disk, wrap it in plastic wrap, and refrigerate for at least 30 minutes (or up to 3 days). This chilling step is crucial, as it allows the gluten to relax and the butter to firm up, resulting in a flakier crust.
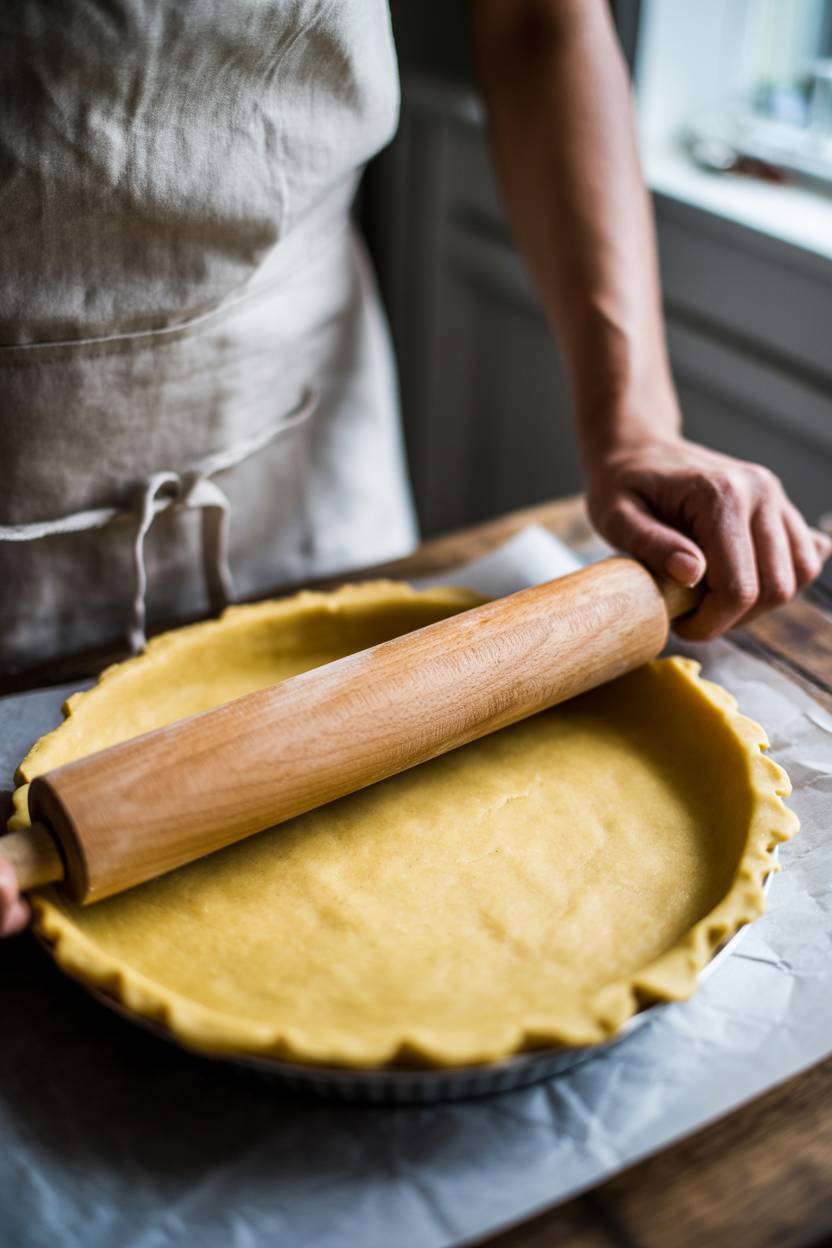
- Roll Out the Crust: On a lightly floured surface, roll the chilled dough out into a circle about 12 inches in diameter and 1/8 inch thick. Carefully transfer the dough to a 9-inch pie plate, gently pressing it into the bottom and up the sides. Trim any excess dough, leaving a 1-inch overhang. Fold the overhang under itself and crimp the edges to create a decorative border.
- Blind Bake the Crust: Preheat your oven to 375°F (190°C). Line the dough-lined pie plate with parchment paper or foil and fill it with pie weights or dried beans. Bake for 20 minutes, then remove the weights and liner. Continue baking for an additional 10-15 minutes, or until the crust is golden brown. Allow the crust to cool completely before filling.
⏱ Timing Overview
• Chill time: 30 minutes
• Baking time: 30-35 minutes
• Cooling time: 30 minutes
• Total Time: 1 hour 20 minutes
🍽 Nutritional Information
Nutritional information is an estimate per serving, based on 8 servings.
• Protein: 3 g
• Sodium: 237 mg
• Carbohydrates: 22 g
• Fat: 12 g
• Fiber: 2 g
How to Customize This Recipe ?
• To Make it Vegan: Substitute the butter with an equal amount of cold, cubed vegan butter or coconut oil. You may also need to increase the water content by 1-2 tablespoons to achieve the desired texture.
• To Add a Spicy Kick: Incorporate a teaspoon of ground cinnamon, ginger, or nutmeg into the dry ingredients. You can also try adding a pinch of cayenne pepper or a few dashes of hot sauce for a subtle heat that complements the pumpkin flavor.
💫 Plating and Presentation Tips
• Garnish Suggestions: Garnish the pie with a dollop of freshly whipped cream, a sprinkle of toasted pecans or crushed gingersnaps, and a sprig of fresh rosemary or thyme for a festive touch.
• Beverage Pairing: This pumpkin pie pairs beautifully with a warm mug of spiced apple cider or a rich, velvety cup of hot chocolate.
🔍 How to Sidestep Common Cooking Pitfalls ?
• Mistake 2 – Not Chilling the Dough: Skipping the crucial chilling step can result in a shrinking, uneven crust. The resting period allows the gluten to relax and the butter to firm up, ensuring a flakier texture.
• Mistake 3 – Overbaking the Crust: Keep a close eye on the crust during the blind baking process, as over-baking can lead to a dry, brittle texture. Bake until just golden brown, and be sure to let the crust cool completely before filling.
🧊 How to Keep Your Leftovers Fresh ?
• Freezing: The unbaked crust can be frozen for up to 3 months. Wrap it tightly in plastic wrap or foil, and thaw in the refrigerator overnight before using.
• Reheating: To reheat the baked crust, simply place it in a 350°F (175°C) oven for 5-10 minutes, or until warmed through. Avoid microwaving, as this can lead to a soggy, unappetizing texture.
❓ FAQs
Can I use a food processor to make the dough?
Yes, you can absolutely use a food processor to make the pumpkin pie crust dough. Simply pulse the dry ingredients together, then add the cold, cubed butter and pulse until the mixture resembles coarse crumbs. Gradually add the ice water while pulsing until the dough just begins to come together. Be careful not to overprocess, as this can result in a tough crust.
Can I make the dough in advance?
Yes, you can make the dough up to 3 days in advance. Simply wrap it tightly in plastic wrap and refrigerate until ready to use. This allows the gluten to relax, making the dough easier to roll out and resulting in a flakier crust.
What’s the best way to blind bake the crust?
The key to successful blind baking is to line the dough-filled pie plate with parchment paper or foil and fill it with pie weights or dried beans. This helps the crust retain its shape and prevents it from puffing up during baking. Be sure to remove the weights and liner for the final 10-15 minutes of baking to allow the crust to brown and crisp up.
Can I use a different type of flour?
While the combination of all-purpose and whole wheat flour works beautifully in this recipe, you can experiment with other flours as well. A blend of all-purpose and spelt flour or whole wheat pastry flour can also produce delicious results. Just keep in mind that the texture and flavor may vary slightly depending on the flours used.
How do I get a perfectly crimped edge?
To achieve a beautifully crimped edge, gently fold the excess dough under itself, creating a double-thick edge. Then, use your thumb and index finger to pinch and crimp the dough, working your way around the entire pie plate. This technique not only adds visual appeal but also helps to reinforce the crust, preventing it from shrinking during baking.
🌟 Wrapping It Up
This pumpkin pie crust recipe is a true labor of love, but the end result is well worth the effort. Imagine a golden-brown, flaky crust that perfectly complements the rich, creamy pumpkin filling – it’s a harmonious marriage of flavors and textures that will have your guests singing your praises.
Whether you’re baking for a cozy family gathering or a grand holiday feast, this classic pumpkin pie crust is sure to be the star of the show.
So, preheat your oven, roll up your sleeves, and let’s get to work on creating a dessert that will leave a lasting impression on all who indulge.

Classic, Hearty Pumpkin Pie Crust Recipe
⏱️ Timing Overview
🥘 Ingredients
📝 Instructions
- In a large bowl, whisk together the all-purpose flour, whole wheat flour, salt, and sugar. Add the chilled, cubed butter and use a pastry cutter or your fingers to work the butter into the dry ingredients until the mixture resembles coarse crumbs with some pea-sized pieces of butter remaining. Gradually add the ice water, 1 tablespoon at a time, and mix gently with a fork until the dough just begins to come together. Do not overmix.
- Shape the dough into a disk, wrap it in plastic wrap, and refrigerate for at least 30 minutes (or up to 3 days). This chilling step is crucial, as it allows the gluten to relax and the butter to firm up, resulting in a flakier crust.
- On a lightly floured surface, roll the chilled dough out into a circle about 12 inches in diameter and 1/8 inch thick. Carefully transfer the dough to a 9-inch pie plate, gently pressing it into the bottom and up the sides. Trim any excess dough, leaving a 1-inch overhang. Fold the overhang under itself and crimp the edges to create a decorative border.
- Preheat your oven to 375°F (190°C). Line the dough-lined pie plate with parchment paper or foil and fill it with pie weights or dried beans. Bake for 20 minutes, then remove the weights and liner. Continue baking for an additional 10-15 minutes, or until the crust is golden brown. Allow the crust to cool completely before filling.