Air dry clay is the sourdough starter of the crafting world: humble, accessible, and capable of transforming into something truly artisanal with just a little patience and the right technique. For beginners, it offers immediate gratification without the intimidation of a high-temperature kiln.
Whether you are looking to curate a minimalist aesthetic for your home office or seeking a tactile weekend meditation, working with clay invites you to slow down and shape raw earth into functional art.
In this curated collection, we treat crafting with the same reverence as a Michelin-starred recipe. We will explore textures ranging from smooth, porcelain-like finishes to rustic, organic surfaces. You will learn the ‘mise en place’ of sculpting rolling, scoring, slipping, and sealing to ensure your creations are not only beautiful but durable.
Clear off the kitchen table it is time to get your hands a little dirty and create something tasteful.
Project #7: The Classic Minimalist Trinket Dish
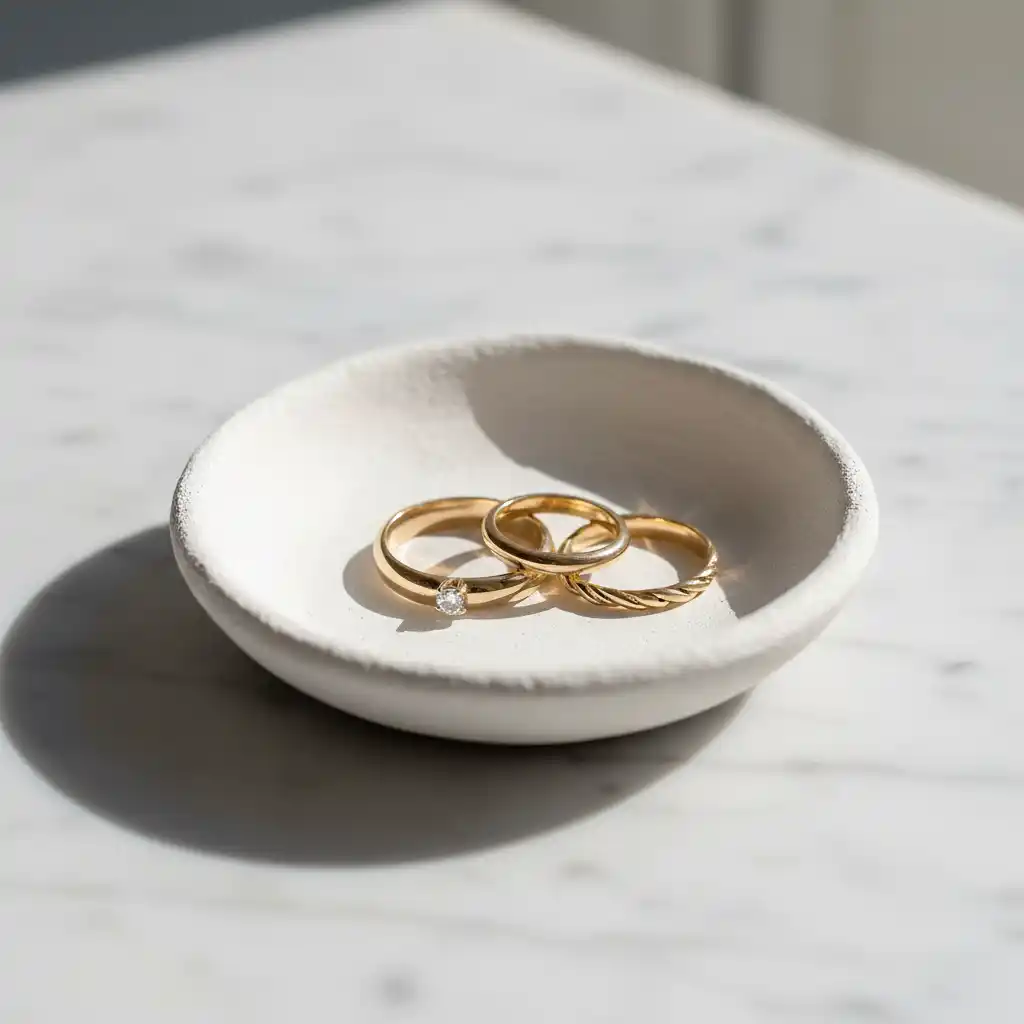
Think of this as the ‘vanilla bean panna cotta’ of clay projects: simple, elegant, and impossible to mess up. This dish features smooth, raised edges and a pristine white finish, perfect for holding rings or sea salt. The texture is sanded to a satin-soft perfection, offering a high-end ceramic look without the firing process.
Ingredients
| Material | Quantity |
|---|---|
| White Air Dry Clay | 200g |
| Rolling Pin | 1 |
| Craft Knife | 1 |
| Small Bowl (for mold) | 1 |
| Sandpaper (Fine Grit) | 1 sheet |
| Acrylic Varnish (Gloss) | 1 bottle |
Directions
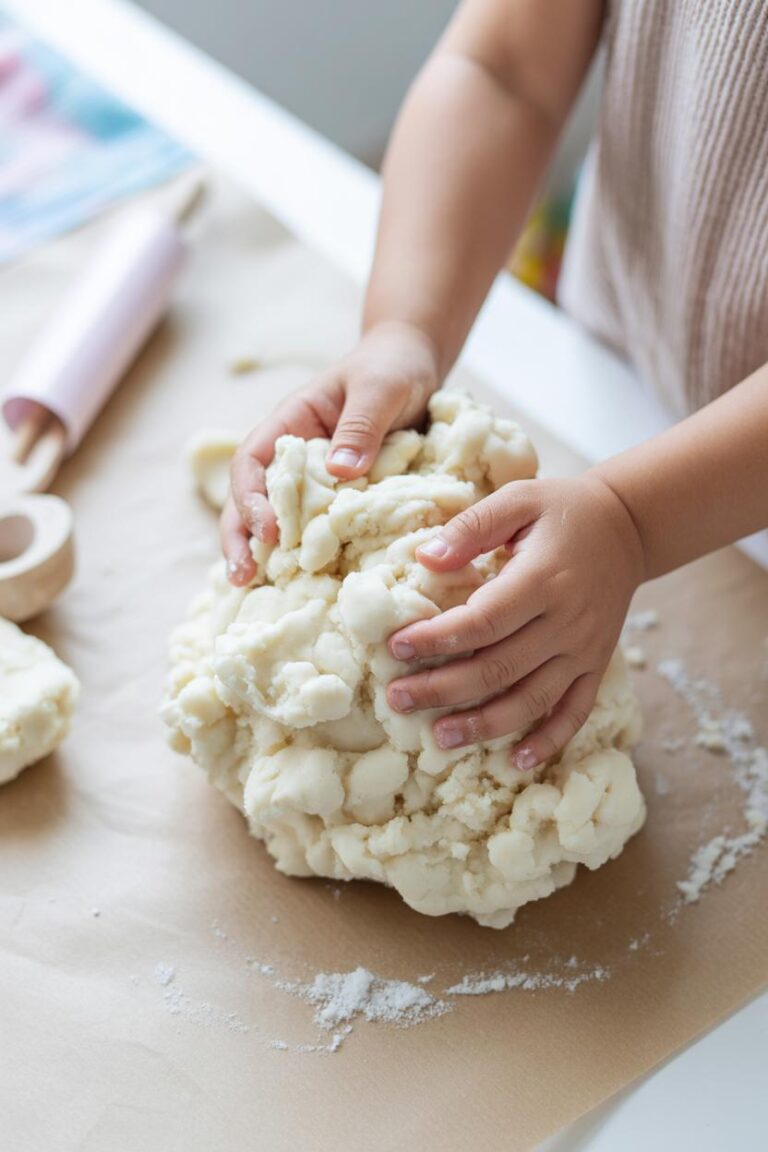
- Prep the Clay: Knead the clay until it is warm and pliable to remove air bubbles.
- Roll and Cut: Roll the clay out to a consistent 1/4 inch thickness. Use the bowl as a template to cut a perfect circle with your craft knife.
- Shape the Form: Gently drape the clay circle inside the bowl to create a subtle curve. Dip your finger in water to smooth the edges.
- Dry and Refine: Allow to dry for 24-48 hours. Once bone dry, sand the edges until silky smooth.
- Seal the Deal: Apply two coats of gloss varnish to protect the surface and give it a ceramic shine.
Project #6: Textured Pinch Pot Planter
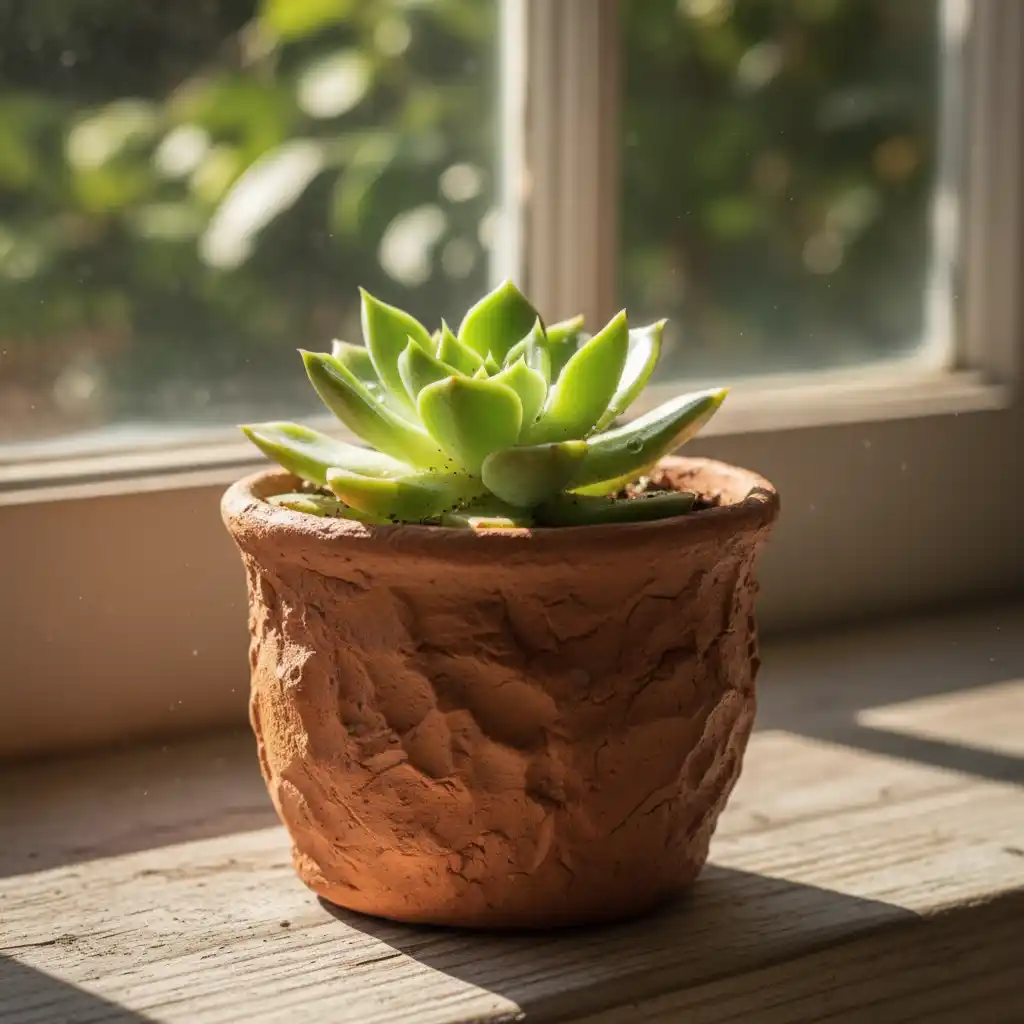
A rustic, organic vessel that celebrates the mark of the maker. This project relies on the ancient pinch method, resulting in a charmingly imperfect shape ideal for small succulents. The exterior carries the tactile memory of your fingertips, or can be stamped for a patterned relief that catches the light beautifully.
Ingredients
| Material | Quantity |
|---|---|
| Terracotta Air Dry Clay | 300g |
| Sponge | 1 |
| Water | 1 cup |
| Canvas or Cloth | 1 |
| Matte Sealer | 1 jar |
Directions
- Form the Base: Roll the clay into a smooth, tight sphere about the size of a tennis ball.
- Pinch the Walls: Insert your thumb into the center (not going all the way through) and pinch the clay between your thumb and fingers, rotating as you go to thin the walls evenly.
- Level the Top: Gently tap the base on the table to flatten it so it stands. Use a damp sponge to smooth the rim.
- Add Texture: Optionally, press a piece of lace or burlap into the wet clay for texture.
- Cure and Plant: Let dry completely (3 days). Seal inside and out with a waterproof sealer before adding a succulent.
Project #5: Botanical Impression Coasters

These coasters capture the fleeting beauty of nature, fossilizing leaves or flowers into the clay surface. They offer a sophisticated, earthy aesthetic with a smooth, flat finish that protects your furniture. The subtle veins of the plants create a delicate relief that looks stunning when highlighted with a wash of diluted paint.
Ingredients
| Material | Quantity |
|---|---|
| White Air Dry Clay | 250g |
| Fresh Leaves/Flowers | Assorted |
| Rolling Pin | 1 |
| Round Cookie Cutter | 1 |
| Watercolor Paints | 1 set |
| Waterproof Mod Podge | 1 bottle |
Directions
- Roll the Slab: Roll your clay out on a flat surface to 1/3 inch thickness.
- Make Impressions: Arrange leaves vein-side down on the clay. Roll over them firmly with the rolling pin to embed the pattern.
- Cut and Peel: Use the cookie cutter to cut out the coasters. Carefully peel away the plant matter to reveal the detailed impression.
- Dry Flat: Place a book on top of the drying coasters (sandwiched between parchment paper) to prevent warping.
- Enhance and Seal: Once dry, use a light watercolor wash to highlight the veins, then seal with waterproof Mod Podge.
Project #4: Mid-Century Modern Wall Hanging
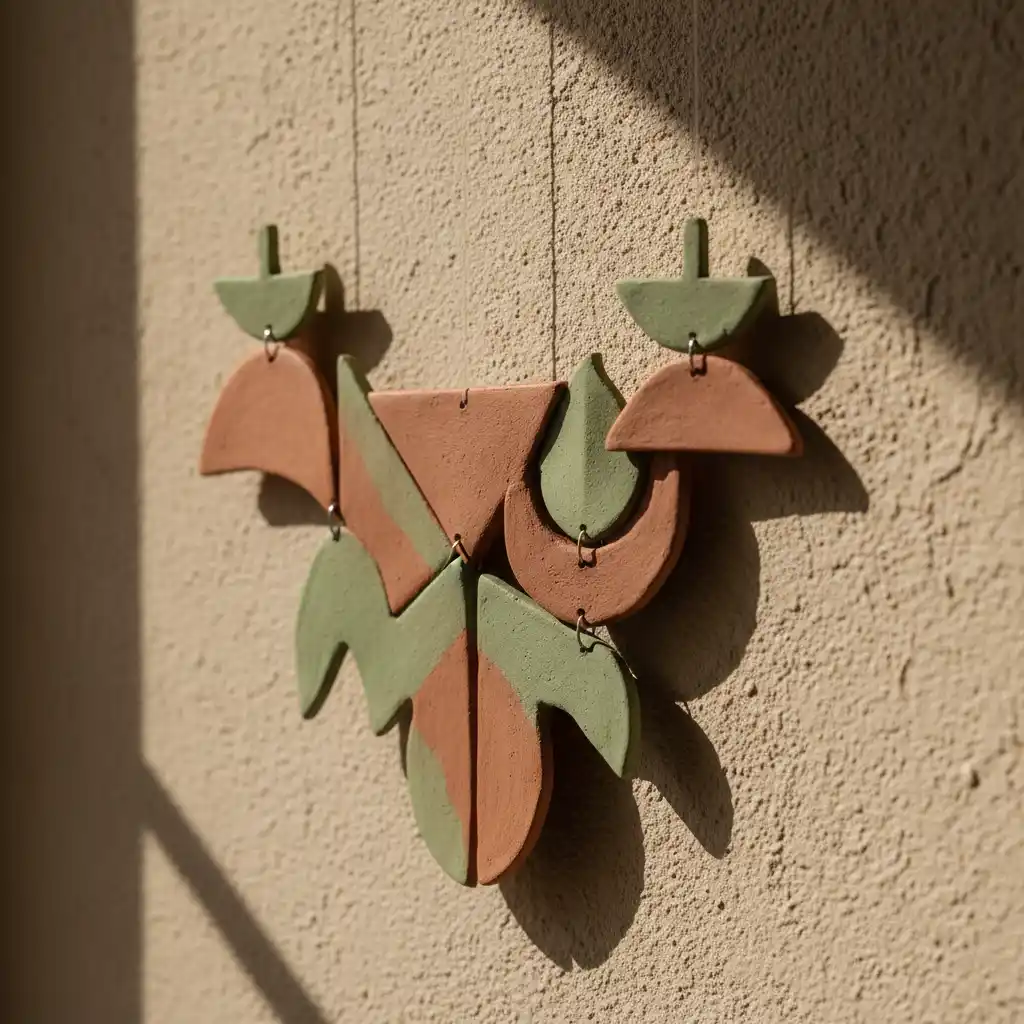
An assembly of geometric shapes that brings a gallery-worthy mobile into your living room. This project focuses on clean lines and balance, combining circular and semi-circular clay pieces with natural twine. It is a visual feast of movement and shadow, perfect for filling vertical space with an artistic touch.
Ingredients
| Material | Quantity |
|---|---|
| Air Dry Clay | 400g |
| Cookie Cutters (various) | 1 set |
| Straw or Skewer | 1 |
| Jute Twine | 2 meters |
| Driftwood or Dowel | 1 piece |
| Acrylic Paint (Earth Tones) | 3 colors |
Directions
- Create Shapes: Roll out clay and cut various geometric shapes (circles, half-moons, arches).
- Pierce Holes: Before drying, use a straw to punch holes at the top and bottom of each piece for connecting.
- Sand and Paint: After drying, sand the edges smooth. Paint the shapes in a cohesive palette of terracotta, sage, and cream.
- Assemble: Thread the twine through the holes, knotting to secure each piece, creating a vertical chain.
- Mount: Tie the chains to a piece of driftwood or a wooden dowel and hang.
Project #3: Braided Incense Holder
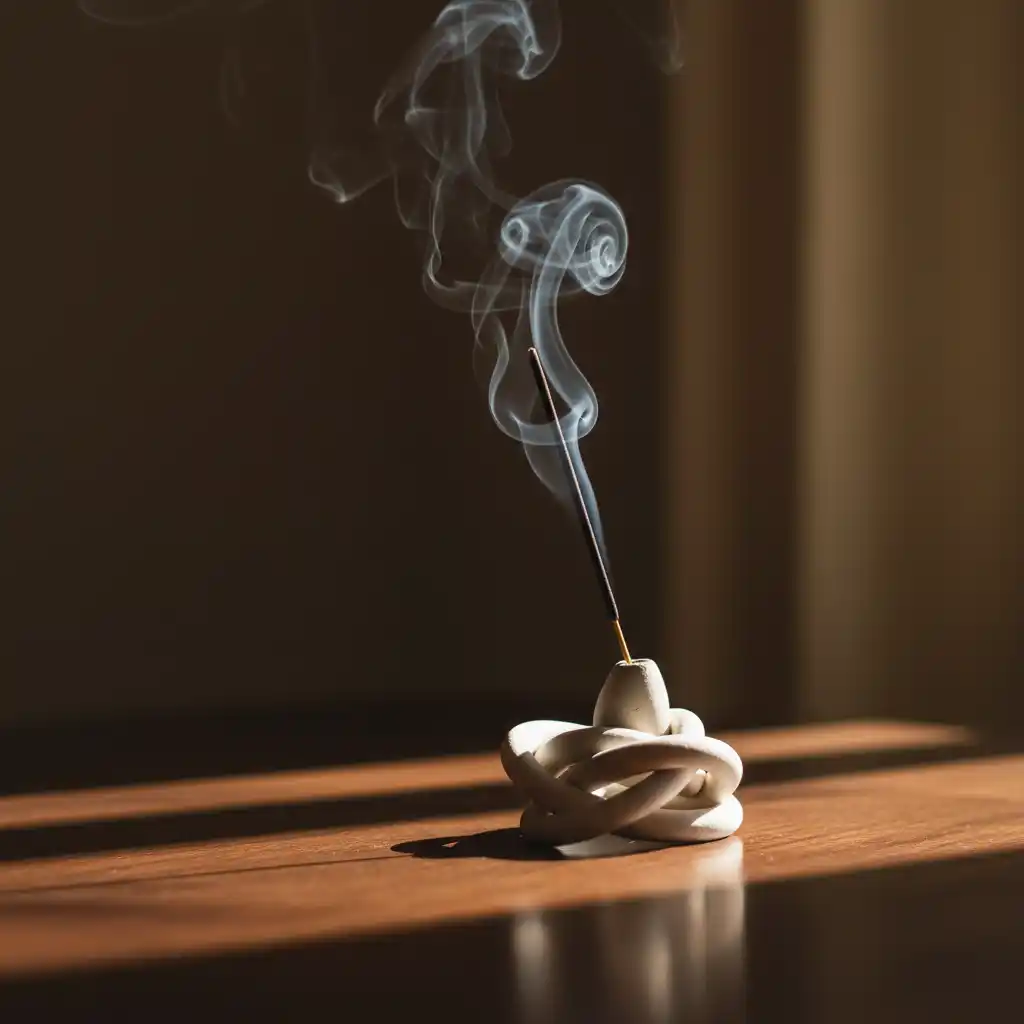
This functional sculpture features two ropes of clay twisted together, resembling a baker’s dough twist. It provides a sturdy, elongated base to catch ash while adding a sculptural element to your coffee table. The finish can be left raw for a stone-like effect or glazed for a modern pop.
Ingredients
| Material | Quantity |
|---|---|
| Air Dry Clay | 150g |
| Water (for slip) | Small bowl |
| Skewer | 1 |
| Sandpaper | 1 sheet |
| Acrylic Paint (Optional) | 1 tube |
Directions
- Roll Coils: Create two long, even snakes of clay, roughly 6 inches long.
- Twist: Gently twist the two coils together. Pinch the ends tightly to seal them and tap on the table to flatten the base.
- Create Insert: Use the skewer to poke a hole into one end of the twist at a 45-degree angle (this will hold the incense stick).
- Dry Slowly: Let it dry away from direct heat to prevent cracking.
- Finish: Sand any rough spots. Leave natural or paint with a speckle pattern.
Project #2: Marbled Clay Jewelry Tray
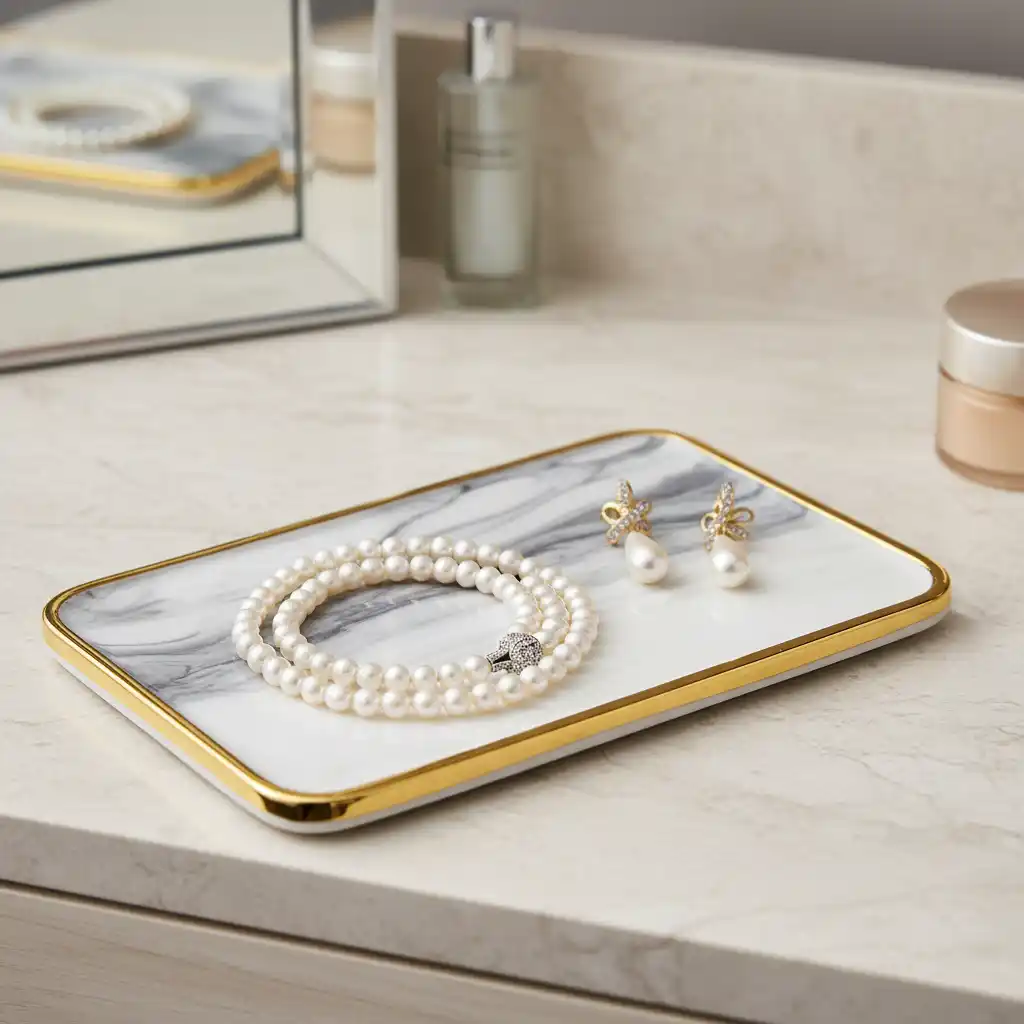
Achieve the opulent look of Carrara marble by mixing colored and white clays. This project is all about the ‘fold and roll’ technique, creating swirling veins of grey or black through a white base. The result is a sophisticated, glossy tray that looks far more expensive than the sum of its parts.
Ingredients
| Material | Quantity |
|---|---|
| White Air Dry Clay | 150g |
| Black Air Dry Clay | 20g |
| Rolling Pin | 1 |
| Rectangular Template | 1 |
| Gloss Varnish | 1 bottle |
| Gold Paint (for rim) | 1 small pot |
Directions
- Mix the Marbling: Roll the white clay into a log. Add small snakes of black clay on top. Twist, fold, and roll the clay until a marble pattern emerges (stop before it turns grey).
- Flatten: Roll the marbled clay into a slab.
- Cut and Shape: Cut a rectangle. Fold up the edges to create a rim and pinch the corners to secure.
- Refine: Smooth the rim with water. Let dry completely.
- Gild: Paint the rim with liquid gold leaf and seal the entire tray with a high-gloss varnish.
Project #1: Geometric Chunky Bead Necklace

Wearable art that makes a statement. These chunky, geometric beads are hand-rolled and faceted, offering a bold, contemporary look. It is a fantastic way to use up scrap clay, and the customization options for color and shape are endless. The texture is light but durable, perfect for everyday wear.
Ingredients
| Material | Quantity |
|---|---|
| Air Dry Clay | 100g |
| Toothpick or Skewer | 1 |
| Craft Knife | 1 |
| Leather Cord | 1 meter |
| Acrylic Paints | Assorted |
| Matte Varnish | 1 bottle |
Directions
- Form Beads: Roll clay into balls, cubes, or cylinders.
- Facet: Use a craft knife to slice off edges of the round beads to create geometric facets.
- Pierce: Use a toothpick to create a hole through the center of each bead. Wiggle it to ensure the hole is wide enough for your cord.
- Dry and Paint: Thread beads on a skewer to dry evenly. Paint in color blocks or geometric patterns.
- String: Thread the finished beads onto a leather cord and knot the ends.
Pro Tips
The Chef’s Secrets for Flawless Clay
Just as a pastry chef relies on temperature and timing, a clay artist must master the environment. Here are the professional secrets to ensure your projects survive the drying process without a crack:
- The ‘Slip’ Technique: Never join two pieces of dry or semi-dry clay without ‘scoring and slipping.’ Scratch cross-hatch marks (scoring) into both surfaces with a needle tool or fork, then apply a paste made of water and clay (slip). This acts as the mortar to bond the pieces permanently.
- Slow Proofing: Avoid the temptation to dry your projects in the sun or near a heater. Rapid drying causes uneven shrinkage, leading to cracks. Dry your pieces slowly in a cool, draft-free area, or loosely cover them with a plastic bag for the first 24 hours to slow the process.
- The Water Polish: Before the clay dries, use a finger dipped in a tiny amount of water to buff away fingerprints and imperfections. It saves hours of sanding later.
- Seal for Longevity: Air dry clay is porous and will dissolve if it gets wet. Always seal your finished work. Use acrylic varnish (matte or gloss) for decor, or a specialized dishwasher-safe sealer (like Mod Podge Dishwasher Safe) if you want extra water resistance (though we still recommend wiping clean rather than submerging).
- Repairing Cracks: If a crack appears during drying, do not panic. Make a thick paste of clay and water, fill the crack, let it dry, and sand it smooth. It is the ‘spackle’ of the craft world.
Conclusion
Working with air dry clay is a reminder that you don’t need industrial machinery or a professional studio to create objects of beauty and function. With just your hands and a few simple tools, you can transform a grey lump of earth into a polished piece of decor that tells a story.
Whether you attempted the simple trinket dish or the complex wall hanging, the joy lies in the process of shaping, smoothing, and refining.
So, keep that bag of clay sealed tight for your next burst of inspiration because once you start sculpting, you will find endless ways to mold your world.